2 Ways to Disable Ram Plus on Samsung Phones (One UI)
Samsung’s implementation of the Memory Extension feature is called RAM Plus, which adds virtual RAM at the cost of a few GBs of your phone’s storage. It was supposed to improve performance, but in reality, turns things worse. The allocated storage space, can’t be recovered unless the RAM Plus feature is disabled. To add to the worse, One UI 4, didn’t allow disabling RAM Plus, fret not as this guide will help you disable RAM Plus and regain lost storage on One UI 4 and One UI 5.
Methods to Disable Ram Plus on Samsung Galaxy Phones (One UI 4 and 5)
After many user requests, Samsung has added the feature to disable RAM Plus from the settings, in One UI 5. However, the option is still missing on older devices running One UI 4, the best you can do is reduce the RAM Plus size to 2 GB. But that didn’t stop us to find a workaround, and we have shared the detailed guide to disabling RAM Plus feature on Samsung galaxy phones running on One UI 4 and One UI 5.
Steps to Turn off RAM Plus on One UI 5
For any Samsung Galaxy phone running on One UI 5, the RAM Plus feature can be disabled completely from the settings. Here’s how you can do it.
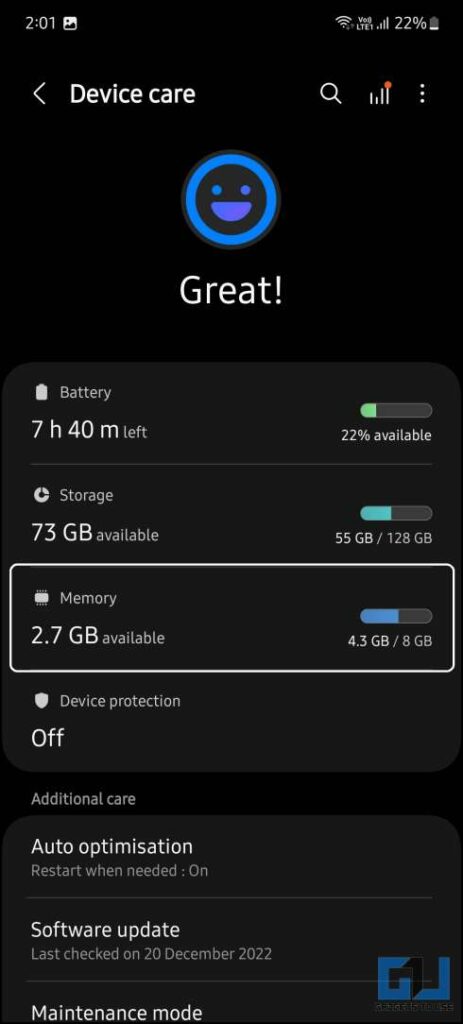
1. Open the Settings on your Samsung phone, and go to Battery and Device care.
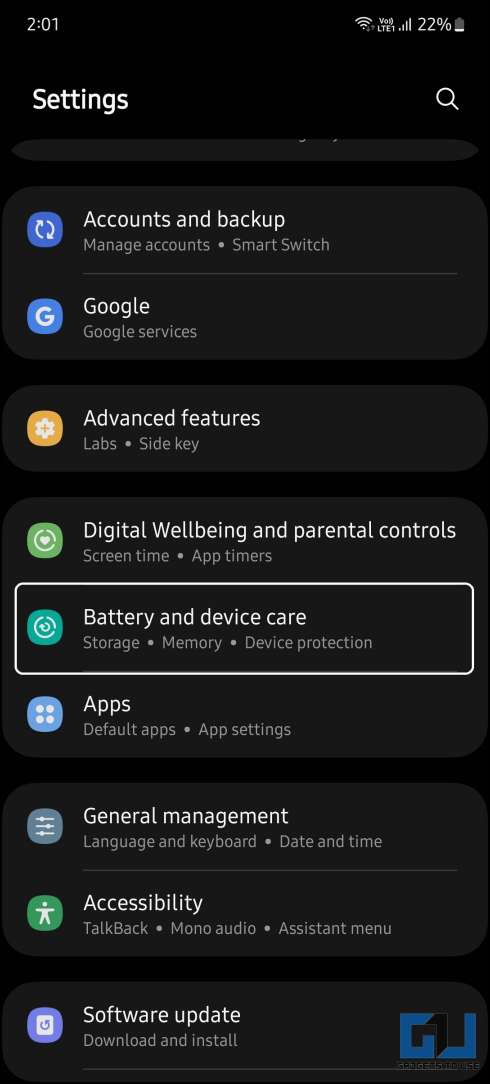
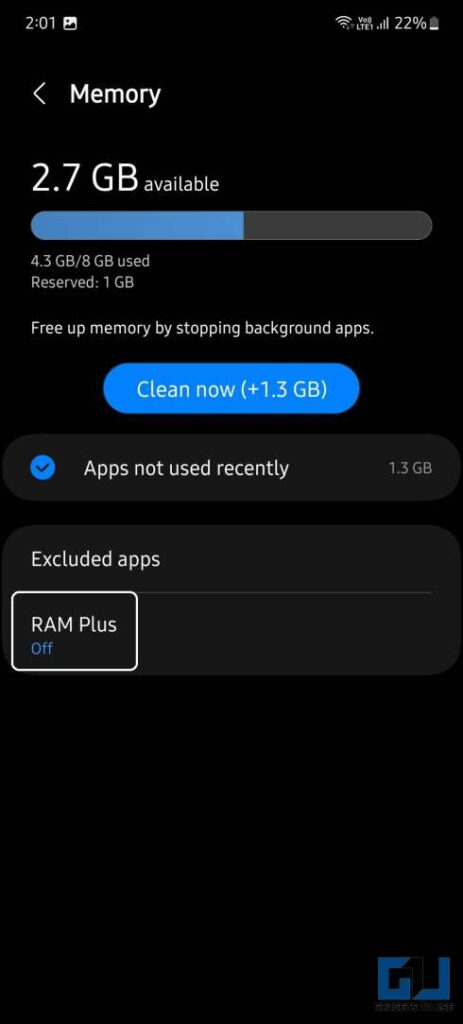
2. Here, select the Memory option, and then tap on RAM Plus.
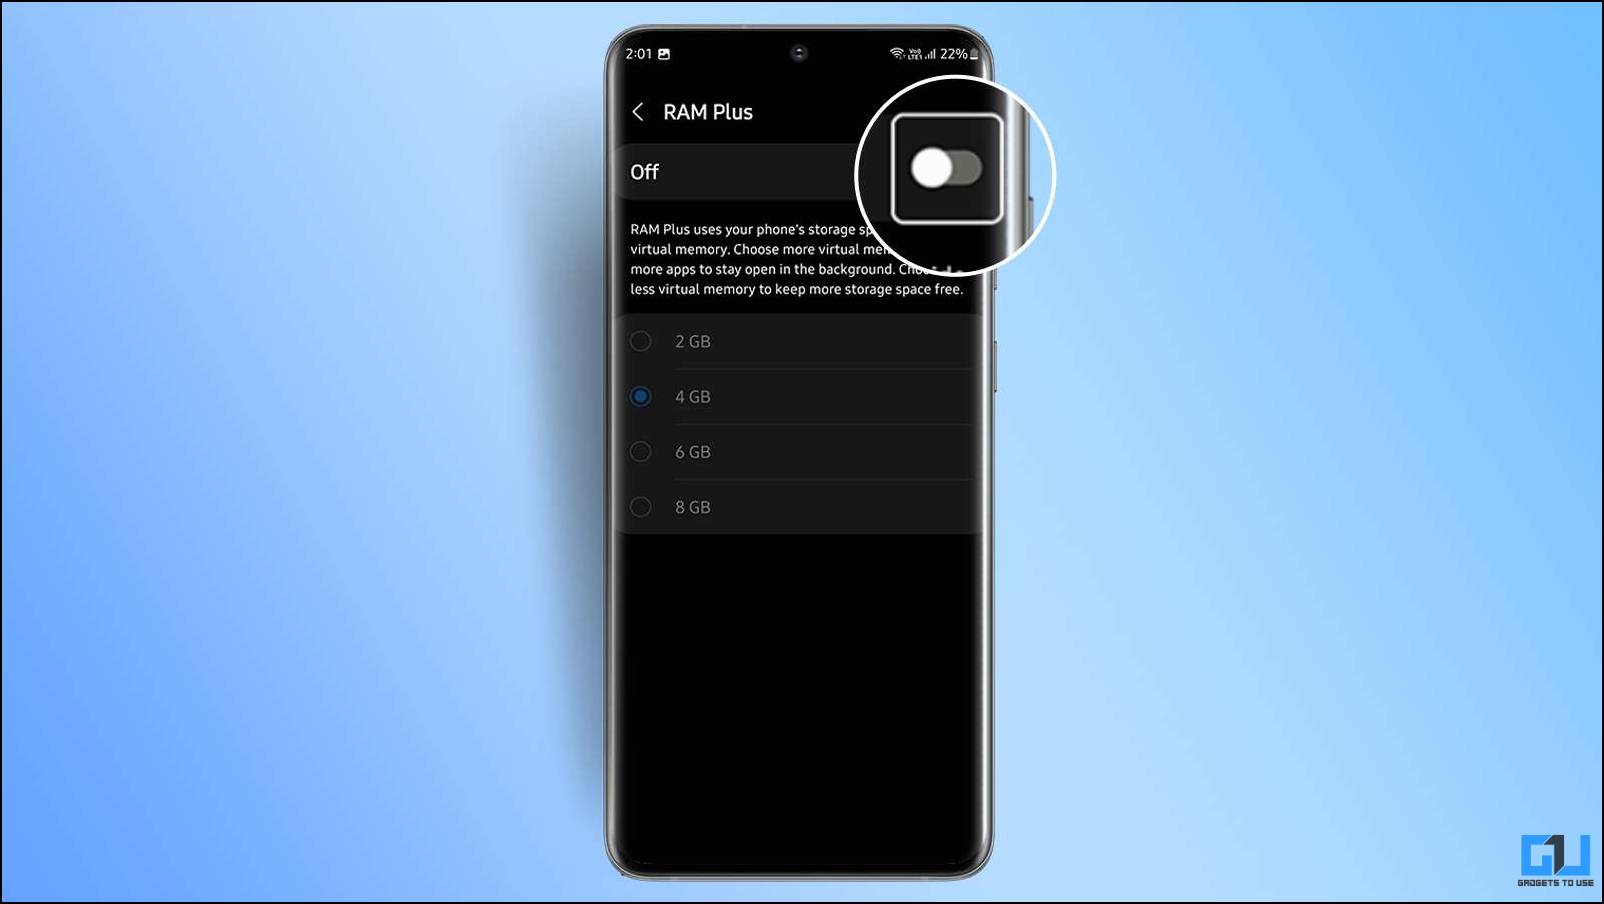
3. On the RAM plus page, turn off the toggle to disable it.
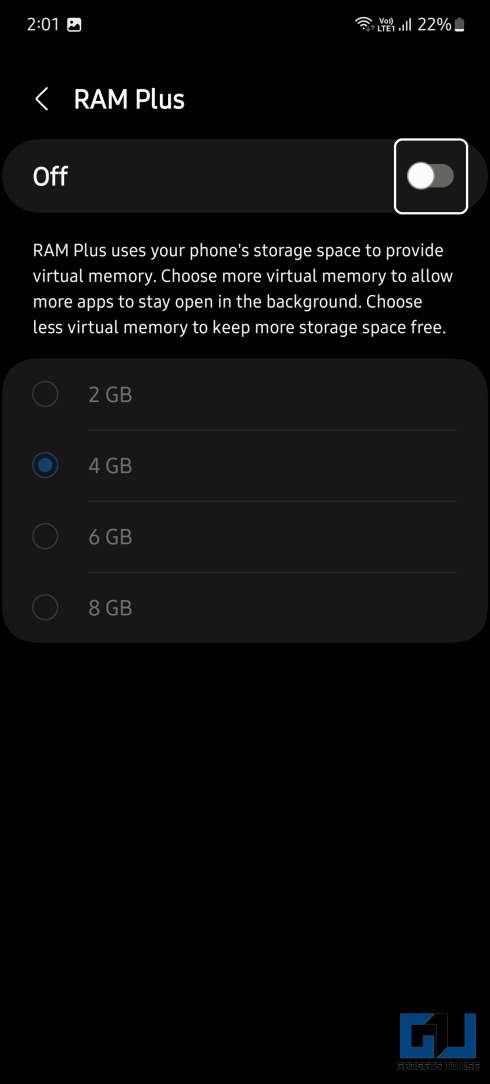
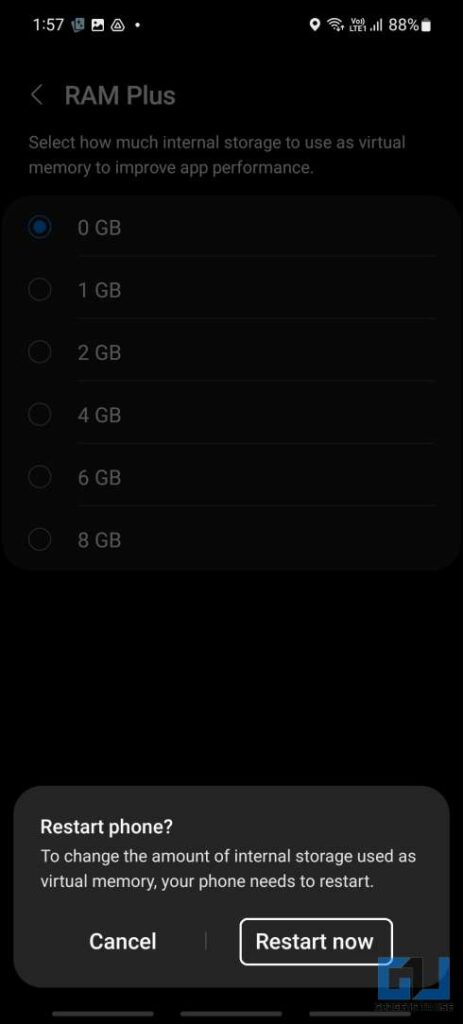
4. Now, select Restart from the pop-up to restart your Samsung phone.
5. Once your Samsung phone reboots, the RAM Plus feature will be disabled.
How to Disable RAM Plus on One UI 4
As we mentioned earlier, there is no such toggle to turn off the RAM Plus feature in One UI 4. However, you can do that using an ADB command. Follow the detailed steps below, as we guide you through the easy steps.
Enable USB Debugging on Samsung phones
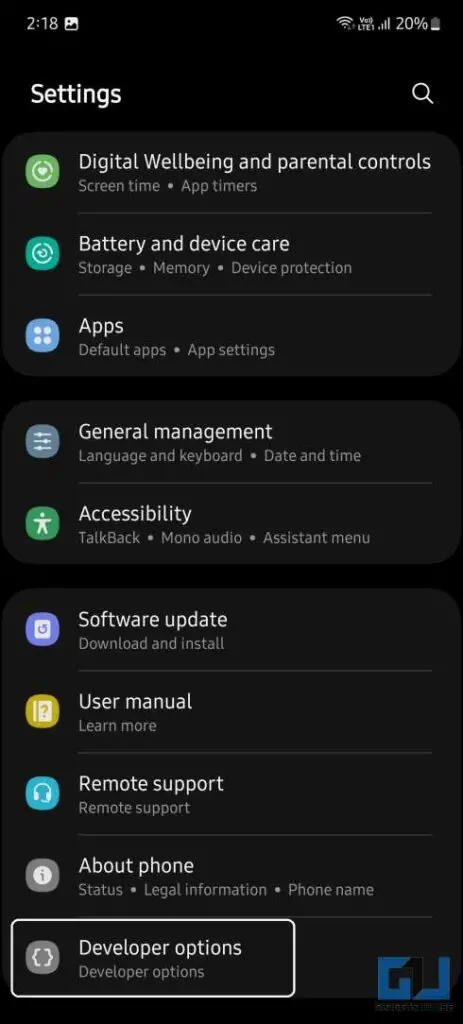
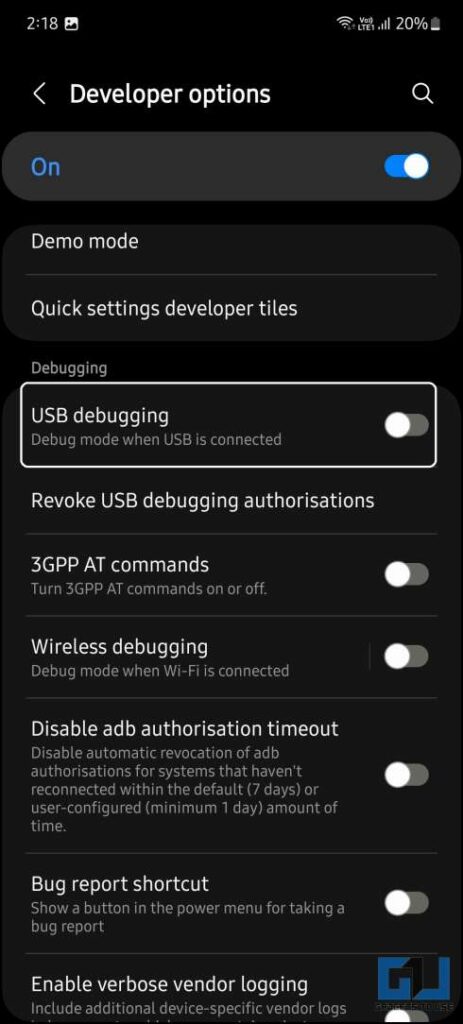
In order to disable RAM Plus on Samsung phones running on One UI 4, first you need to enable Developer Options and USB debugging. Here’s how it can be done:
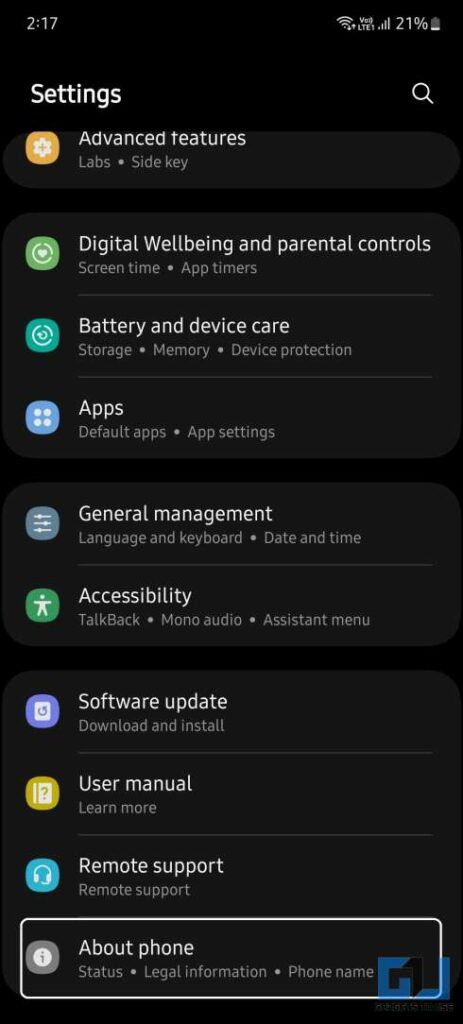
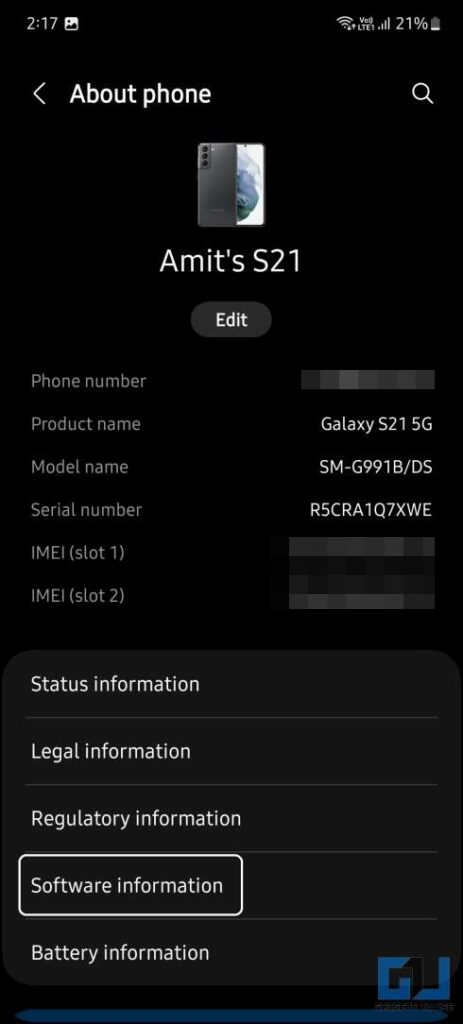
1. Navigate to Settings > About phone > Software information on your Samsung phone.
2. Here, tap on the Build number seven times to unlock Developer Options menu.
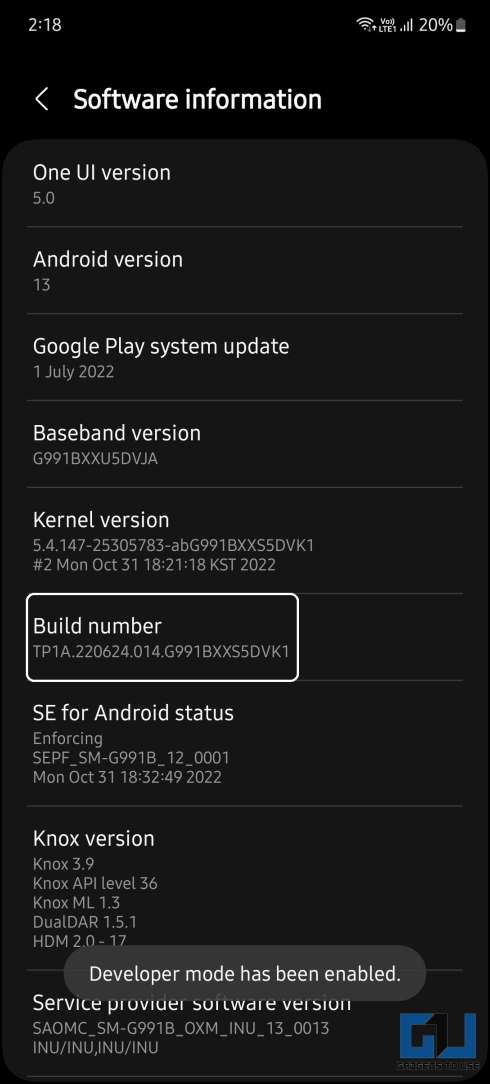
3. Once enabled, go back to the Settings menu and then go to Developer Options.
4. Here, locate the USB Debugging menu and enable the toggle.
Steps to Disable RAM Plus on Samsung One UI 4 Phones
Once the Developer Options is enabled, we need to use an ADB command to alter the options in the RAM Plus feature. Follow these steps to do so:
1. On your PC, download and extract the Platform-tools zip package file on your desktop.
2. Search for the Command prompt in the Start menu and click on Run as Administrator.
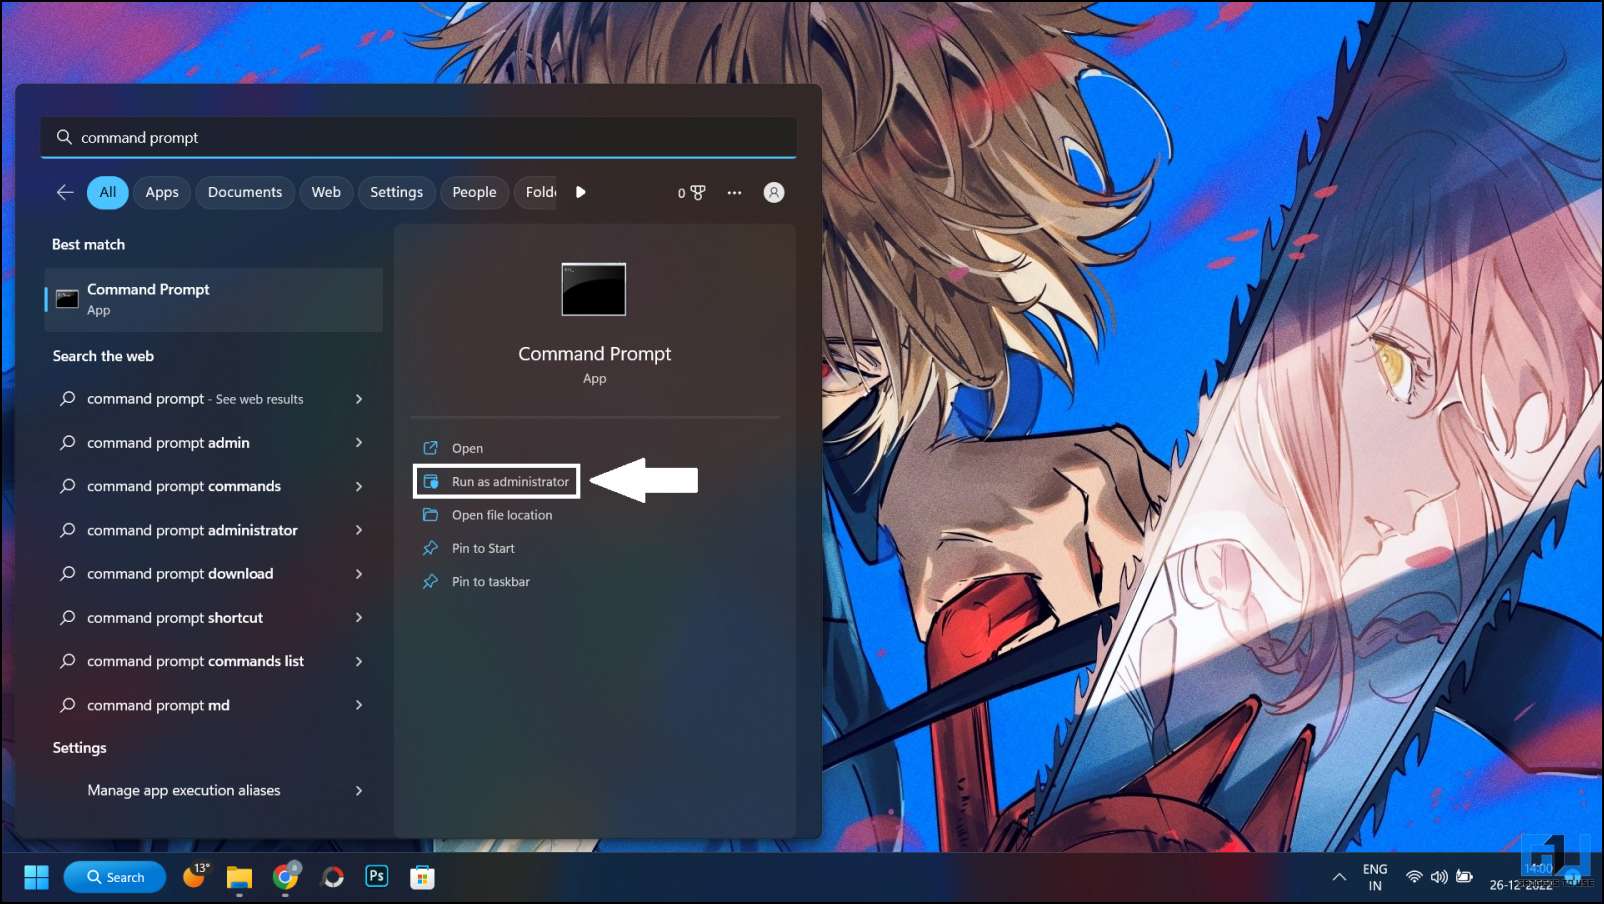
3. Now, type this command without quotes and press Enter key:
cd “platform-tools folder location”
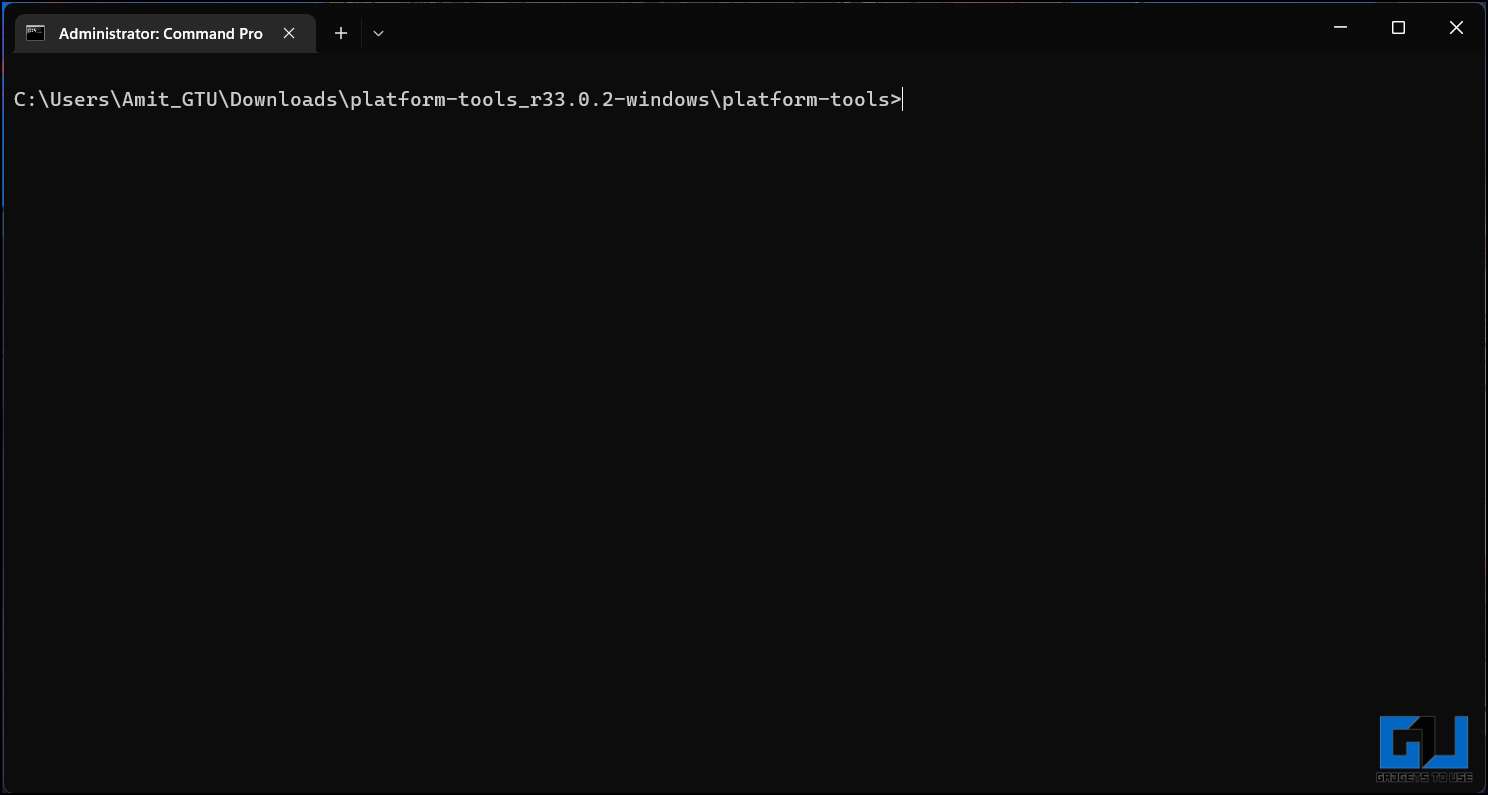
4. Next, Connect your phone to the PC via a USB cable.
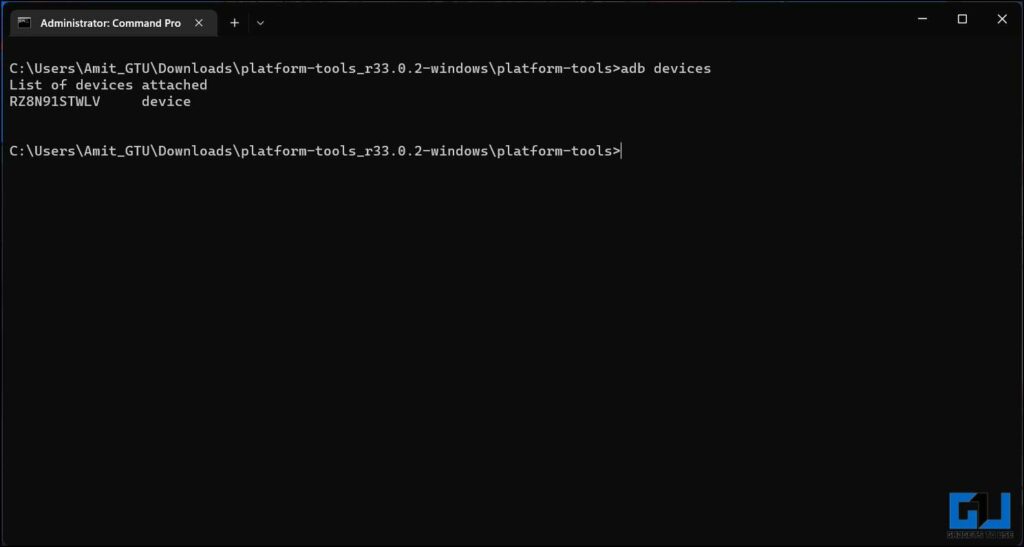
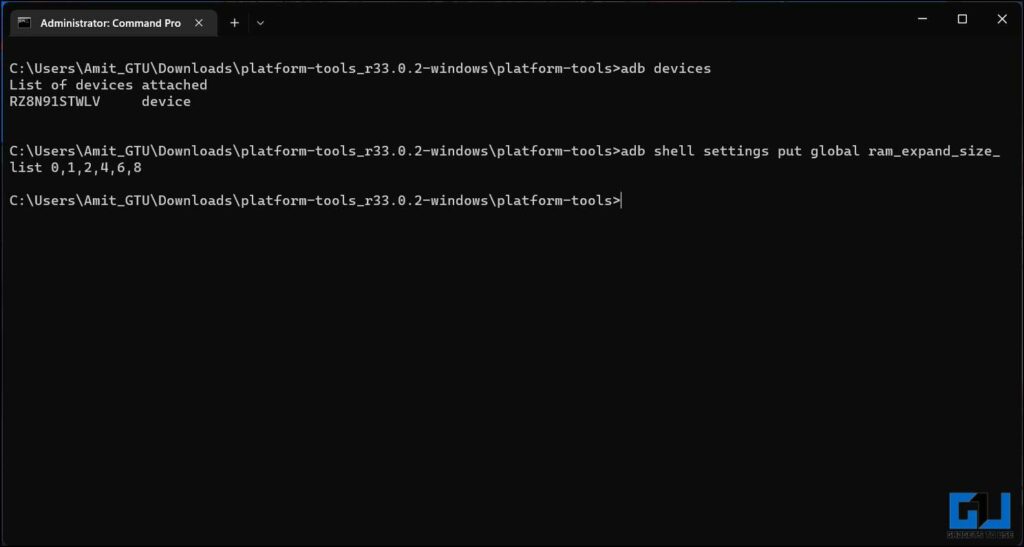
5. Now, execute the following commands in the given order:
adb devices
adb shell settings put global ram_expand_size_list 0,1,2,4,6,8
6. Once all the commands have been executed, disconnect the phone from the PC and reboot it.
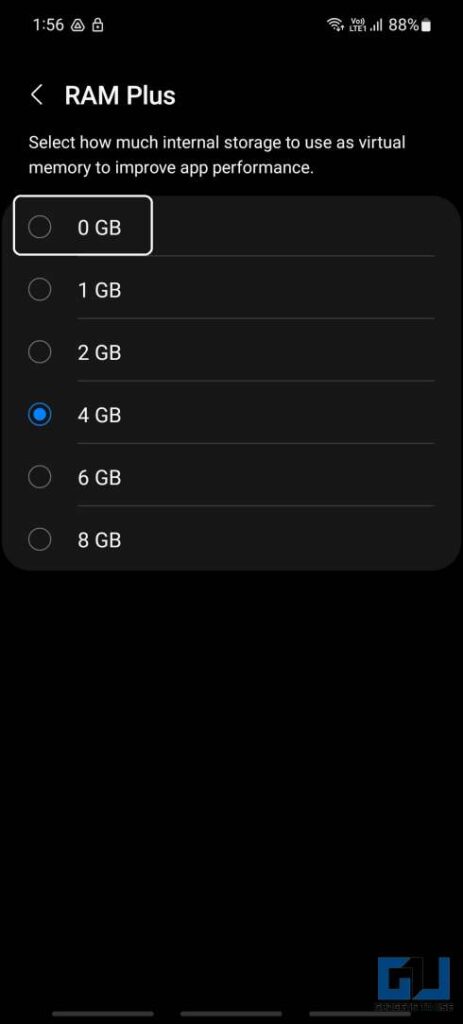
7. After reboot, navigate to Settings > Battery and device care > Memory > RAM Plus and select the 0 GB option.
8. Now, Reboot your Samsung phone once again.
The RAM Plus will be disabled on your Samsung smartphone running the One UI 4 software.
FAQs
Q: What is RAM Plus on Samsung Phones?
A: RAM Plus is found on Samsung Galaxy phones, which intelligently increases RAM memory, by using or allocating the storage space as virtual memory. This helps to run more apps in the background and launch apps faster.
Q: How to turn off RAM plus on a Samsung phone?
A: With One UI 5, you can turn off RAM Plus on your Samsung galaxy phone, from the settings. Follow the guide above to disable it on your Samsung phone.
Q: How to turn off RAM plus on One UI 4 and One UI 5?
A: We have shared the detailed steps to turn off or disable RAM Plus on Samsung phones, running One UI 4 or One UI 5. You can follow them to disable it on your Samsung phone.
Wrapping Up
In this read, we discussed the easy ways to disable RAM Plus on Samsung Galaxy phones running the One UI 4 based on Android 12, or One UI 5 running on Android 13. Now you won’t experience any lags on your smartphone and also get back your lost storage. Stay tuned to GadgetsToUse for more such reads, and check the ones linked below.
You might be interested in:
You can also follow us for instant tech news at Google News or for tips and tricks, smartphones & gadgets reviews, join GadgetsToUse Telegram Group or for the latest review videos subscribe GadgetsToUse YouTube Channel.
