Clicking the picture is merely the first half of creating a good image, whilst the other half is all about great editing that transforms a normal image into a stunning one. In this article, we will cover some extraordinary excellent photo editing features of the Pixel 7 series that can add colors to your life and pictures as well. Meanwhile, you can also read the Google Pixel 7 Pro QnA Review.
![]()
Best Photo Editing Tips For Google Pixel 7 & 7 Pro
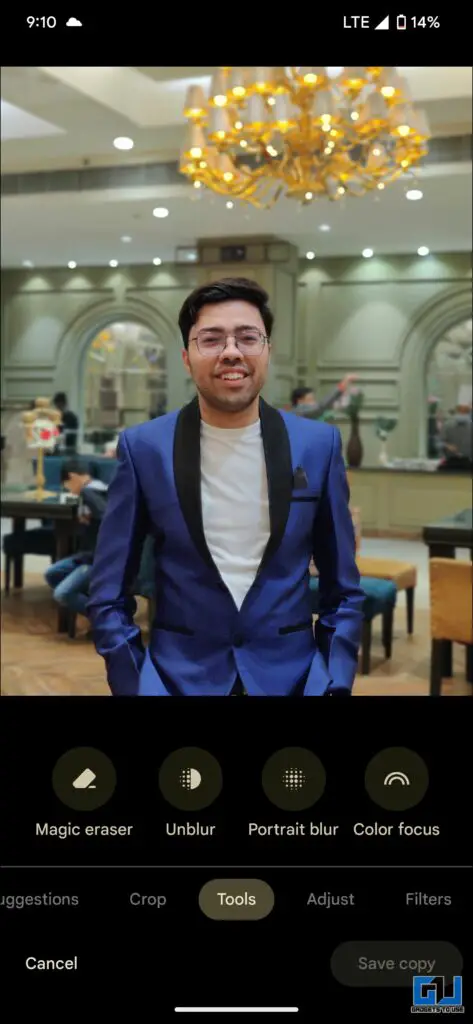
Pixel 7 series comes up with some exclusive photo editing features. Read along as we discuss in detail the eight exciting photo editing features of the Pixel 7 series.
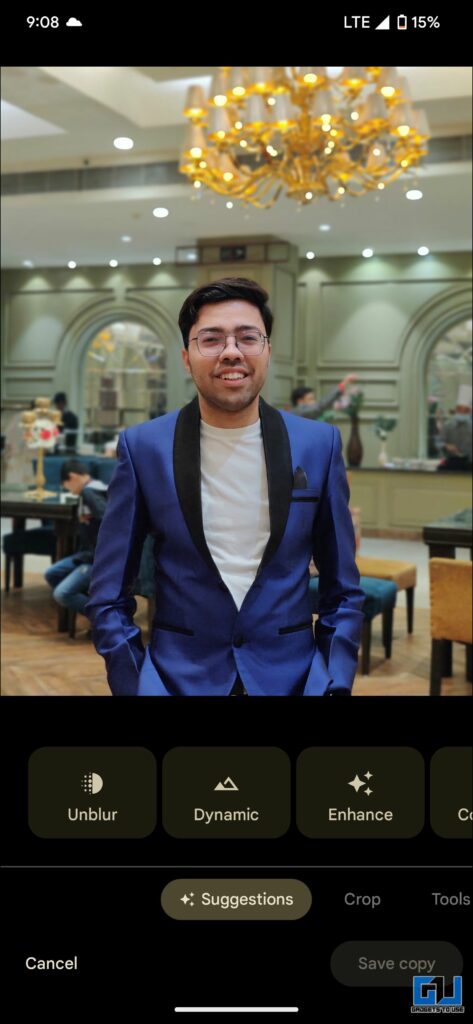
Photo Unblur
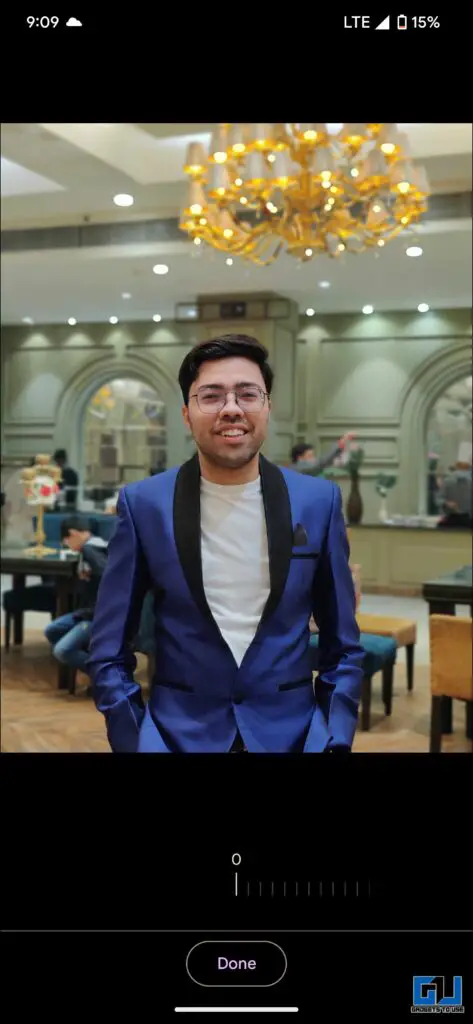
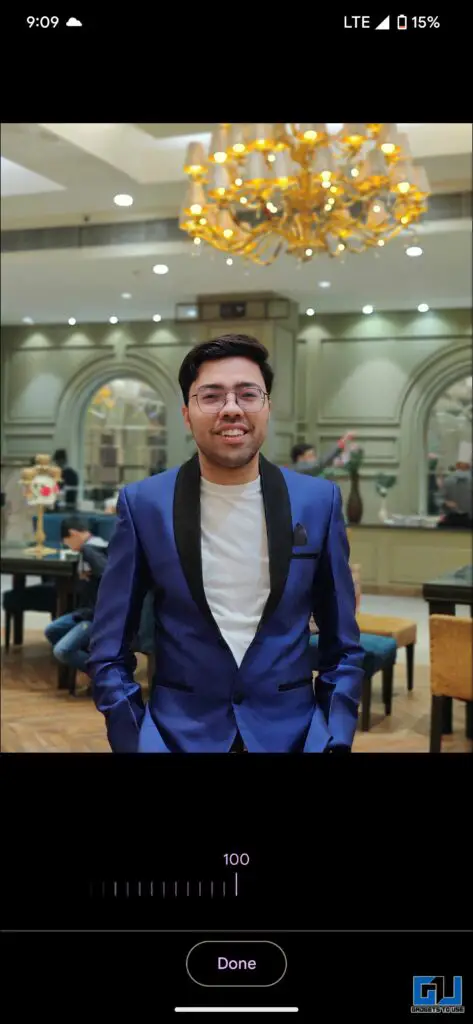
Let’s commence with the Photo Unblur feature. As the name suggests, it helps you to fix accidental motion blur that hampers the photo quality. The best part is that it works on any picture be it shot on the Pixel 7, or with any other phone. The only requirement you need to meet is, that your picture has to be blurry in order to sharpen it and enhance the quality of the picture. Here’s how it works:
1. Open your Google Photos app and open the picture that you find a bit blurred.
2. Tap the Edit button, and you will get the option to unblur in the Suggestion menu.

3. Alternatively, switch to the Tools submenu, to access the unblur option.
4. Tap the Unblur button, and adjust the slider from 0 to 100, with 0 being the lowest or no changes and 100 being the highest or giving you the best unblur effect. You can slide and check what works for you.
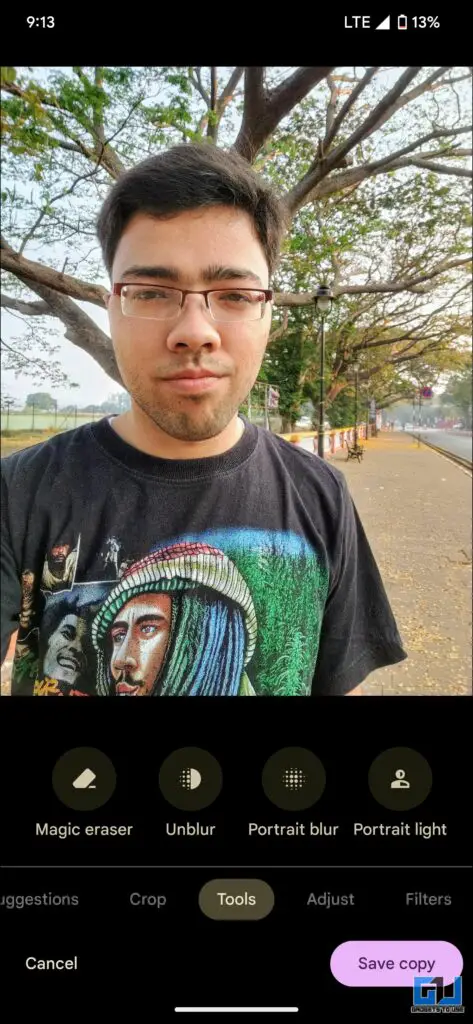
Magic Eraser
Next is Magic Eraser the most popular feature, introduced with the Pixel 6 and Pixel 6 Pro. It lets you remove unwanted objects and people from photos. It sounds incredibly appealing to users that any unwanted object can be removed from pictures in a single click. Just like unblur feature, the Magic eraser can be used to improvise any picture irrespective of the device that it is taken on, which means it isn’t limited to photos taken with a Pixel smartphone.
There are two ways to use Magic Eraser:
- The Pixel 7 or Pixel 7 Pro can automatically detect unimportant objects in a photo and suggest for removal, or,
- You can manually select and remove objects.
Follow the steps given below to know how to use it:
1. Open Google Photos and pick a photo that you want to use Magic Eraser on.
2. Tap the edit button to jump to the Tools tab, and then use Magic Eraser.

4. Tap on Magic Eraser, and the Pixel will suggest prompts to remove unwanted objects from your photo.
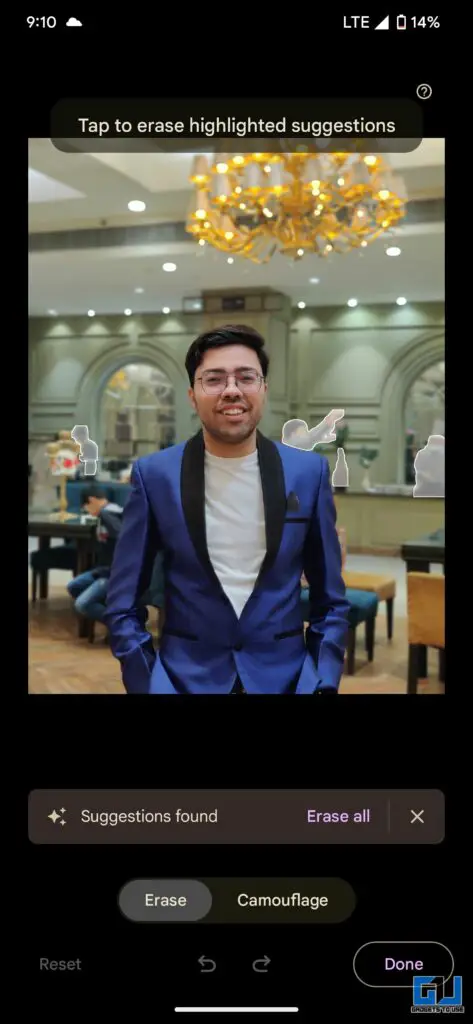
5. Alternatively, you can manually remove unwanted people/objects from the picture, by drawing over or circling them.
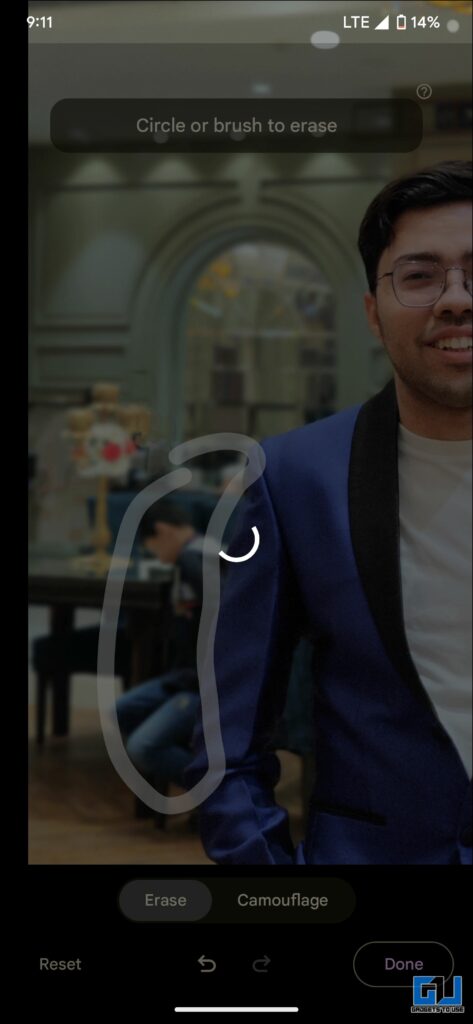
6. Within seconds the selected part will be erased from the picture.

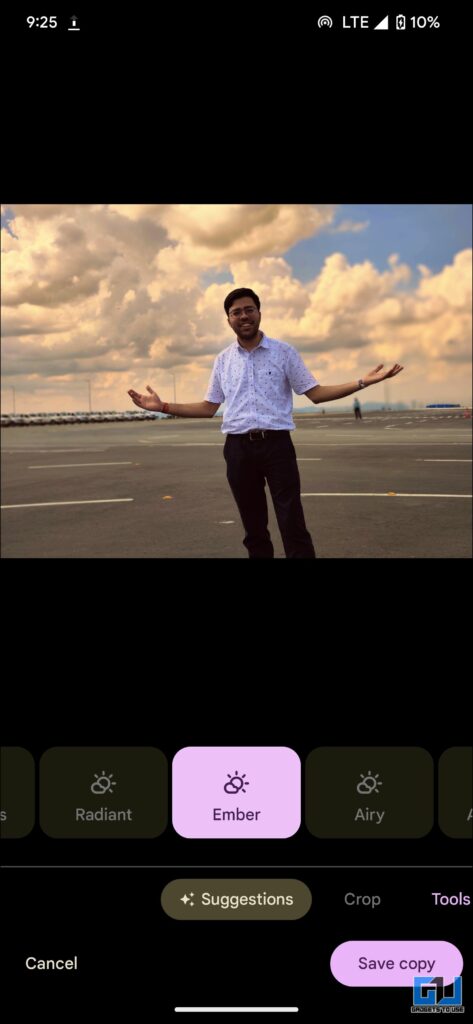
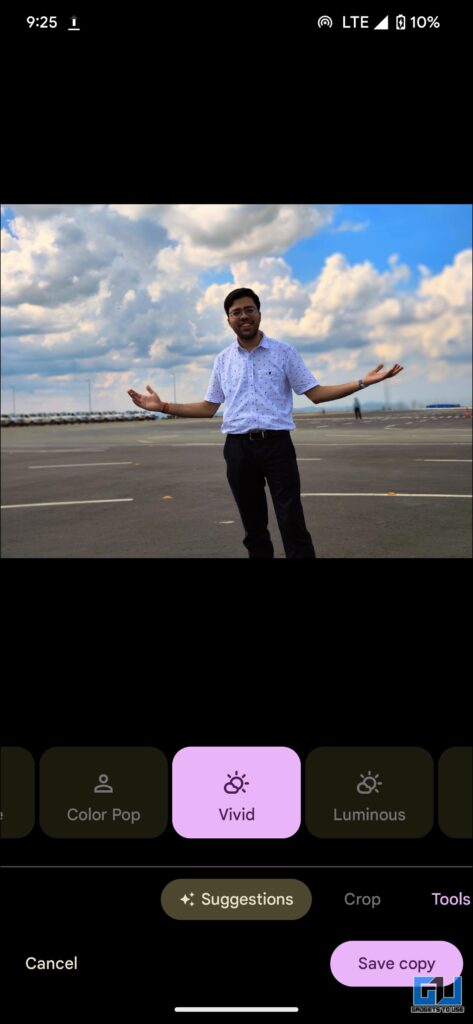
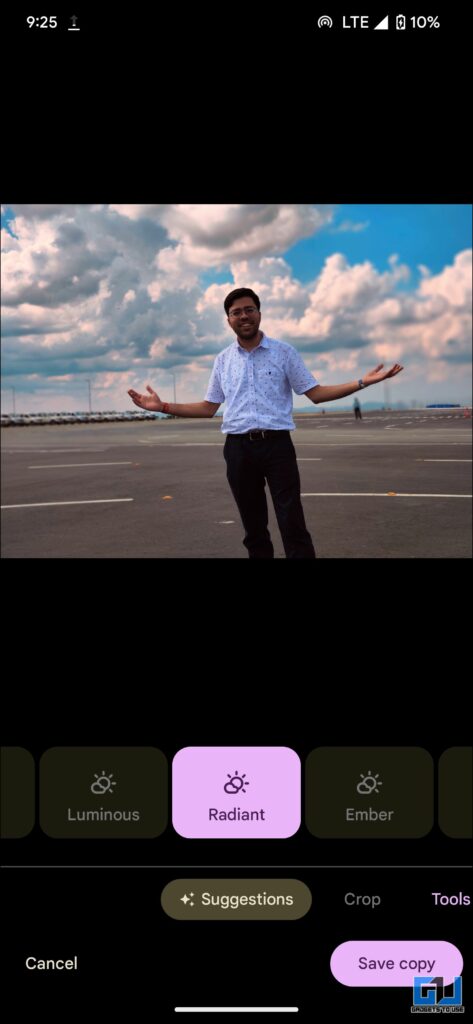
Sky Filter Suggestion
Sky filters can be an interesting option if you are looking to give your photo a new look. It comes up with multiple filter options to choose from like Luminous and Stormy. Let’s find out what are the available options and to what extent can they improve your photo.
1. Open Google Photos and tap the edit option.
2. You will find the different sky Modes listed under the Suggestions tab. To have better control over intensity switch to the Tools tab and find the Sky option there.
3. You can experiment with different sky modes until you find your favorite one.
- Ember Sky: Ember completely changes the mood of the pic to a sunrise. You can compare the original and filtered picture below.
- Vivid: Vivid feels the most natural amongst all. It increases saturation and pumps up the blueness of the sky. Compare the pictures below to notice the difference.
- Radiant Sky: The effect is somewhat similar to vivid but works best with sunset and sunrise images by changing their colors to dramatic tones.
- Luminous & Stormy: If you enjoy the darker mood in pictures with a bit of murky effect then set these two modes to 100 and you can turn your image into a gloomy and doomy one.
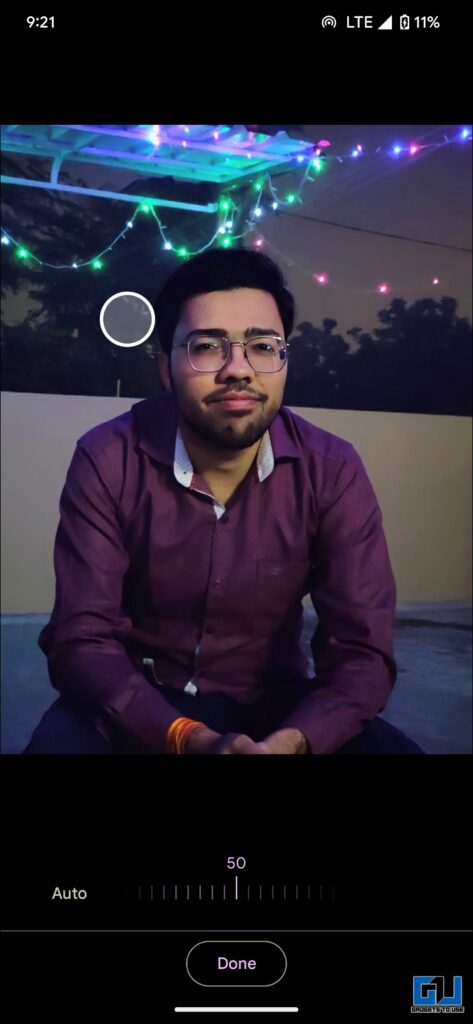
Portrait Blur
This is designed to enhance a selfie or a picture that has been already taken. Have you ever taken a picture and realized later that there is something in the background that is distracting or affecting your experience? Now you can have the solution to that problem by adding portrait effects to your picture, months after it was taken. You can either use the auto portrait or you can also manually set the intensity on your own. Follow the steps given below to learn how is Google One photo editing feature works for free on Pixel phones.
1. Open Google Photos, and under the Edit option navigate to the Tools tab.
2. There tap on the Portrait Blur option, and adjust the slider to tweak the blur and depth intensity.
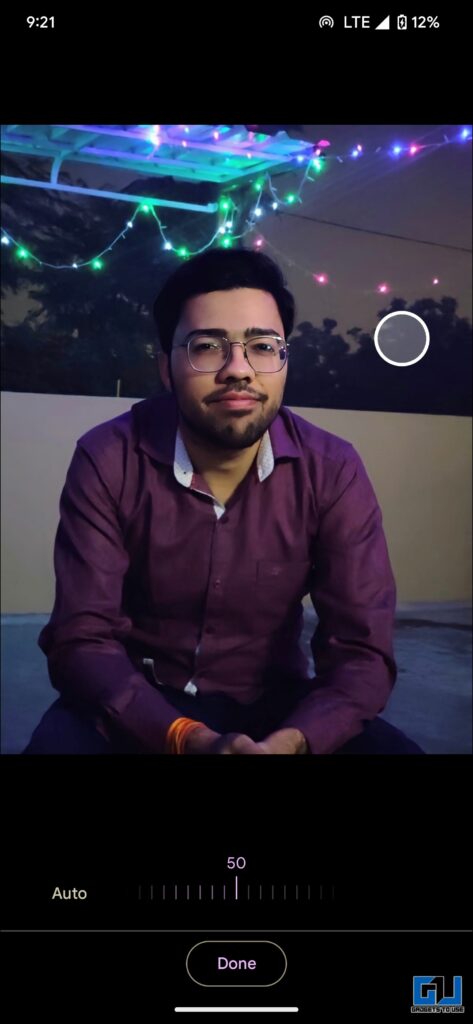
Portrait Light
The Portrait light feature, adds a dramatic feel and gives life to the picture, as you can adjust the light source to enlighten one side of your face and add a shadow on the other side. With the help of an onscreen circle, you can drag it to get the right look, and there’s a slider to adjust the intensity too. Although it is a Google One feature, you get it for free on Pixel phones, and you will be amazed by looking at the pictures after using the effect. Let’s find out how you can use it:
1. Open the Google Photos app, and under the Edit option navigate to the Tools Tab.
2. Besides the Portrait Blur option you will find Portrait Light.
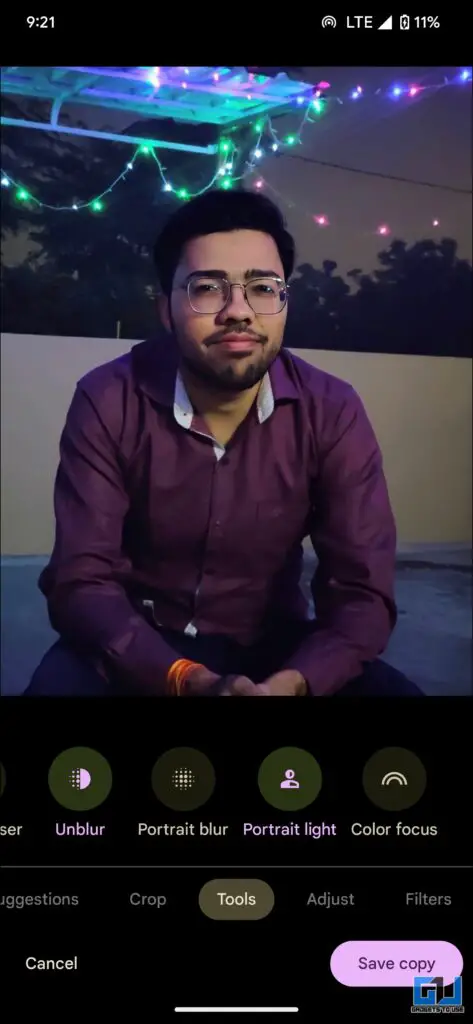
3. You can adjust the intensity from the slider, and position the circle to set the light source.
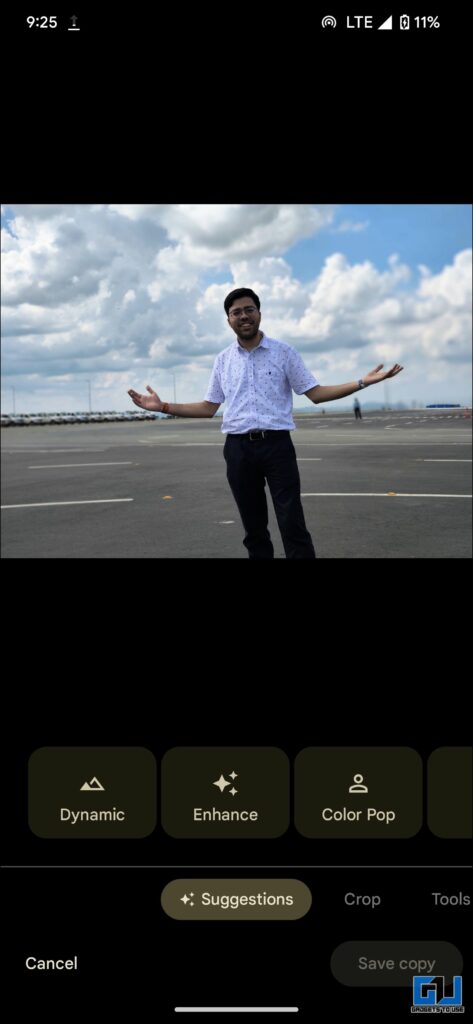
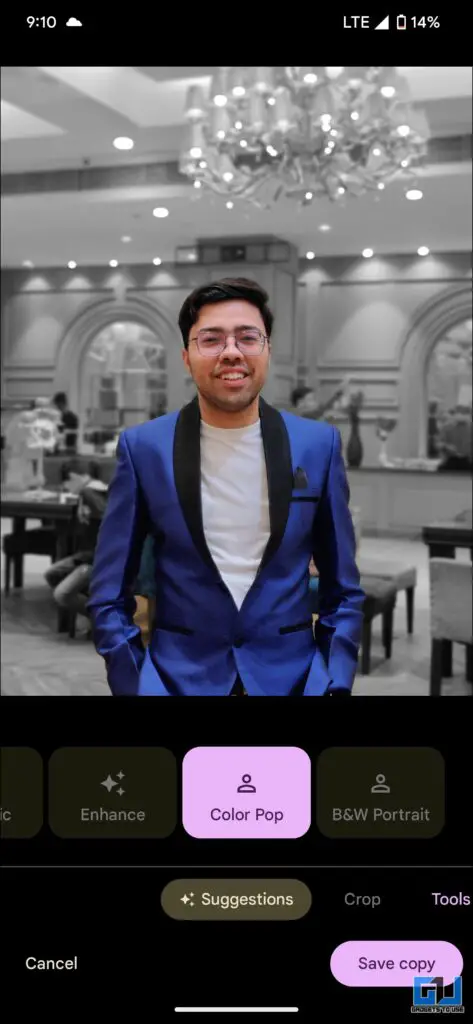
Color Pop Effect
Color Pop is yet another one of the most exciting and my personal favorite feature. It keeps the subject colored and turns the background to black & white. Although this is a Google One-specific feature with the Pixel 7 series you can enjoy it for free. Let’s find out how you can use it:
1. Go to the edit photo option, and navigate to the Suggestions tab.
2. Under suggestions you will get the Color Pop option.
3. A simple tap will desaturate the background, and turn it to black and white. You can see the original and edited pictures below to compare.
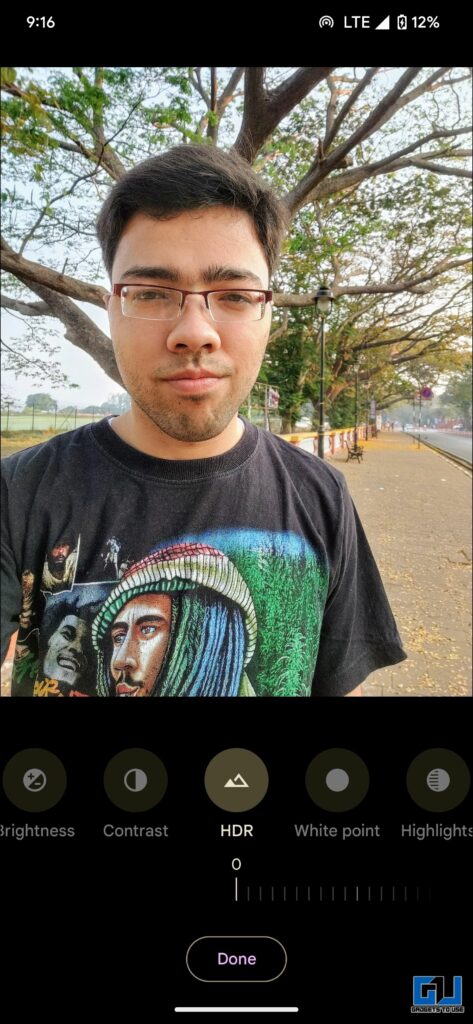
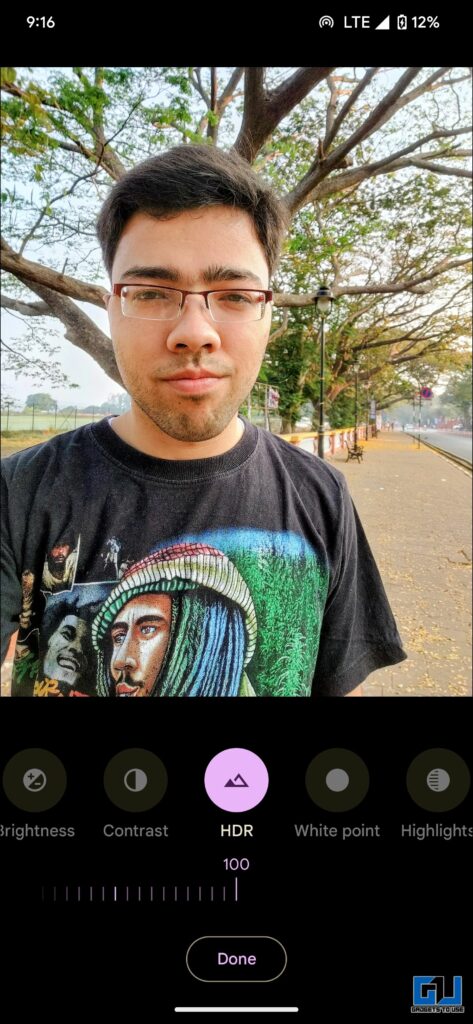
HDR Mode
HDR stands for High Dynamic Range, where the range defines the light and dark tones of the picture. It allows the user to take bright photos with a wide gamut of colors and greater contrast. This is also a ‘Google One’ feature that can be used for free on the Pixel 7 Series.
1. Go to the Edit menu and you will find the option of HDR option under the Adjust Tab.
2. You can use the slider to adjust the intensity of the effect.
3. Below are the two images with the HDR effect set at 0 & 100.
Dynamic Effect
Dynamic is yet another innovative effect found on a Pixel phone. Below are the two images captured in Day-Light and night ambiance. Compare the filters to check the effect in both artificial light and bright light conditions. For non-pixel phones, it is locked behind the Google One subscription.
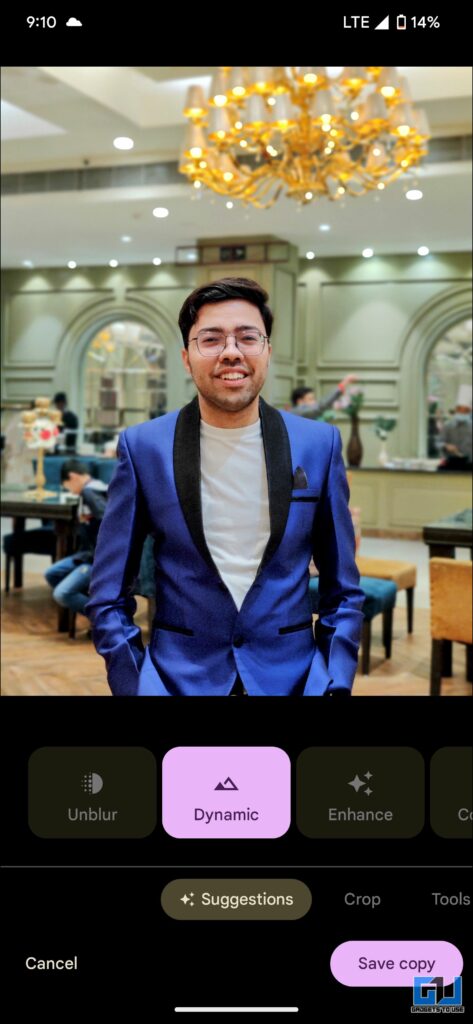
- Dynamic Effect
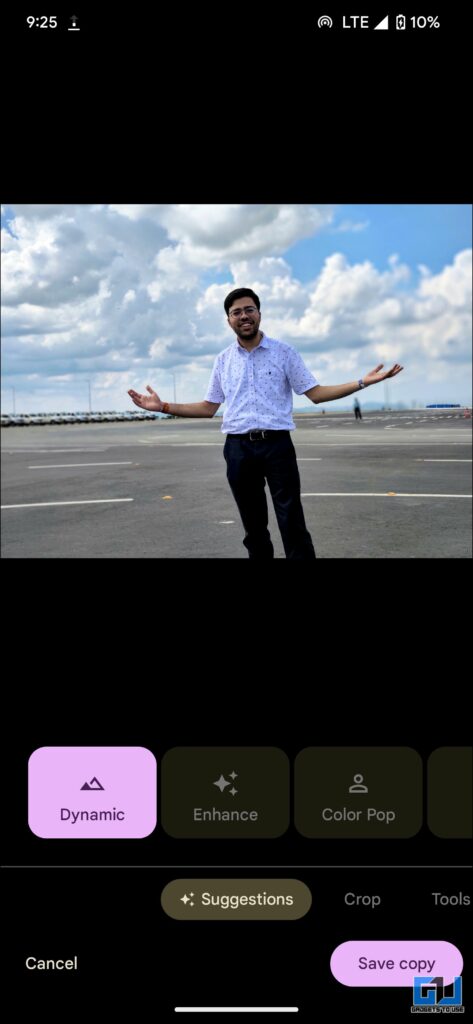
- Dynamic Effect
Wrapping Up
So these are the must-to-know editing features of the Pixel 7 and Pixel 7 Pro. If you found this useful then do share it with your friends who own a Pixel phone. Also, let me know in the comment section below which one is your favorite effect. Check out other useful tech tips and tricks linked below, and stay tuned to GadgetsToUse for more such tips and tricks.
Also Read:
You can also follow us for instant tech news at Google News or for tips and tricks, smartphones & gadgets reviews, join GadgetsToUse Telegram Group or for the latest review videos subscribe GadgetsToUse YouTube Channel.