How to Delete Downloaded Update on Mac Without Installing
By default, your Mac device will automatically check for system updates and download them. Given that update files are quite large, they can take up a significant amount of system storage. So in this article, we will address how to turn off automatic system updates and how to delete the downloaded macOS update on your Mac without installing them.
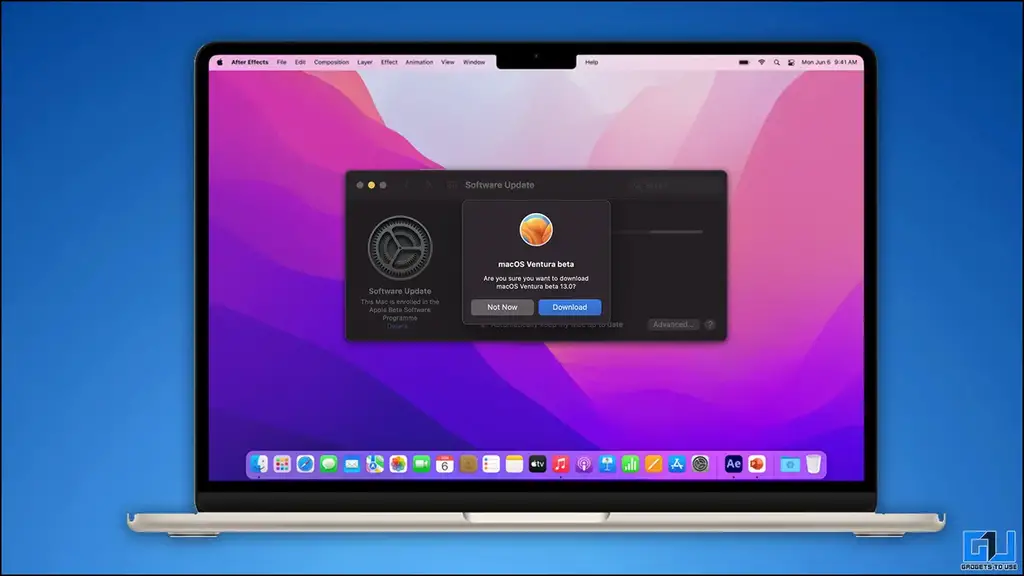
How to Delete a Downloaded Update on Mac?
In case your Mac has already downloaded the update file to your system and it is taking up storage space that you want to clear up for something important then follow the steps below to delete the downloaded update from your Mac. This is for devices running macOS Monetary.
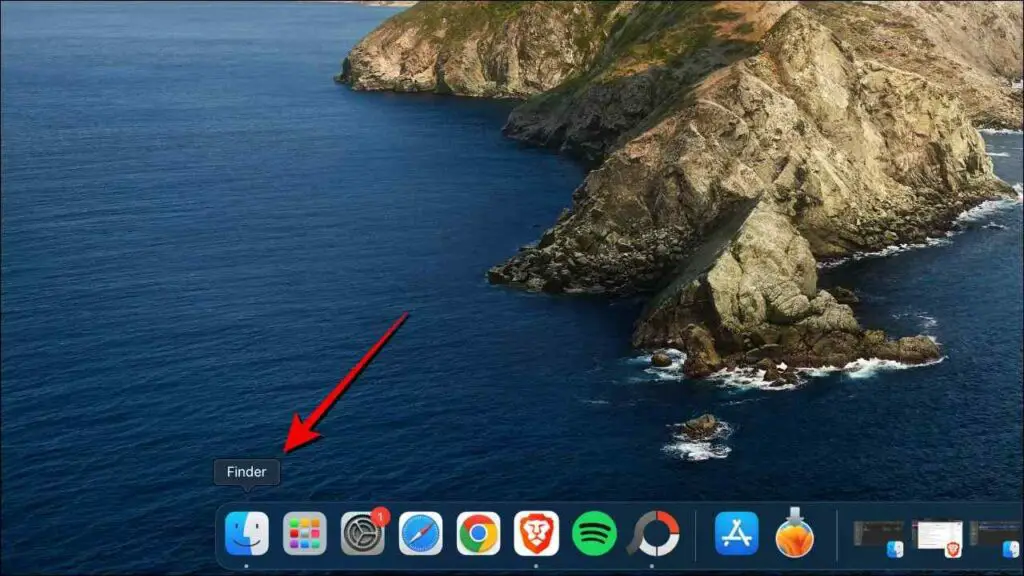
1. Open the Finder from the dock.
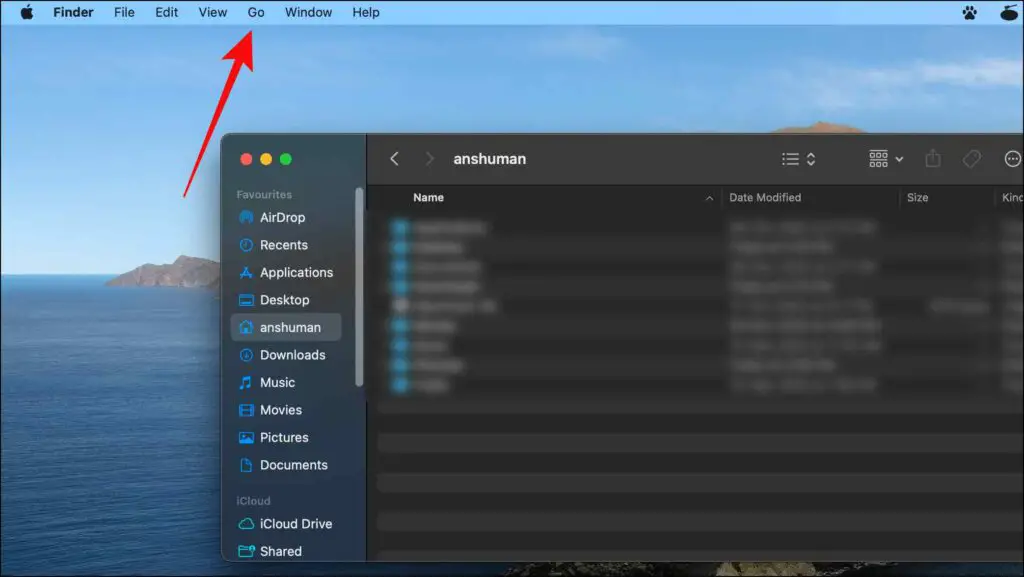
2. Click on the Go option in the top status bar.
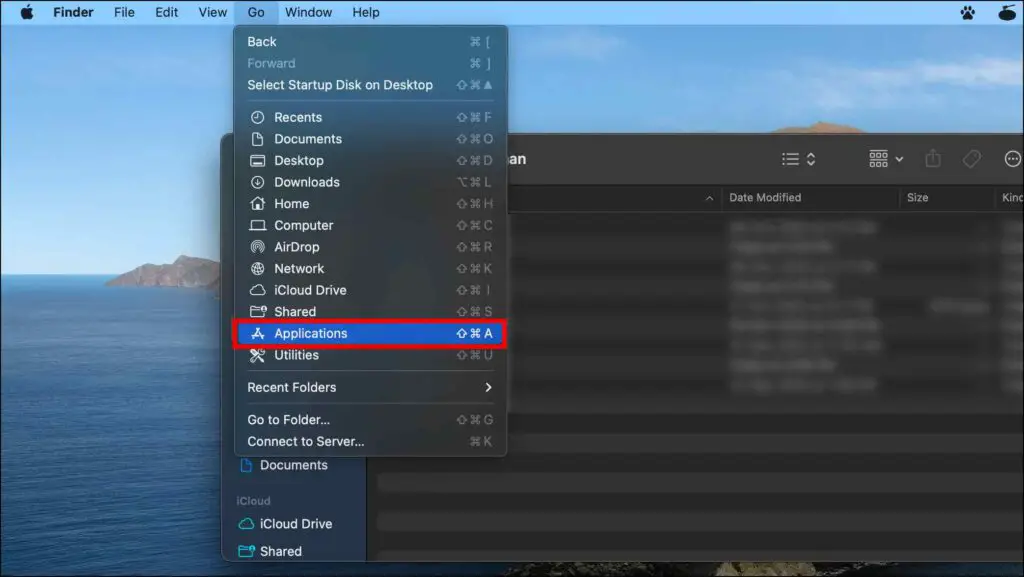
3. From the list, select Applications.
4. Within the Applications folder, search for the macOS update file.
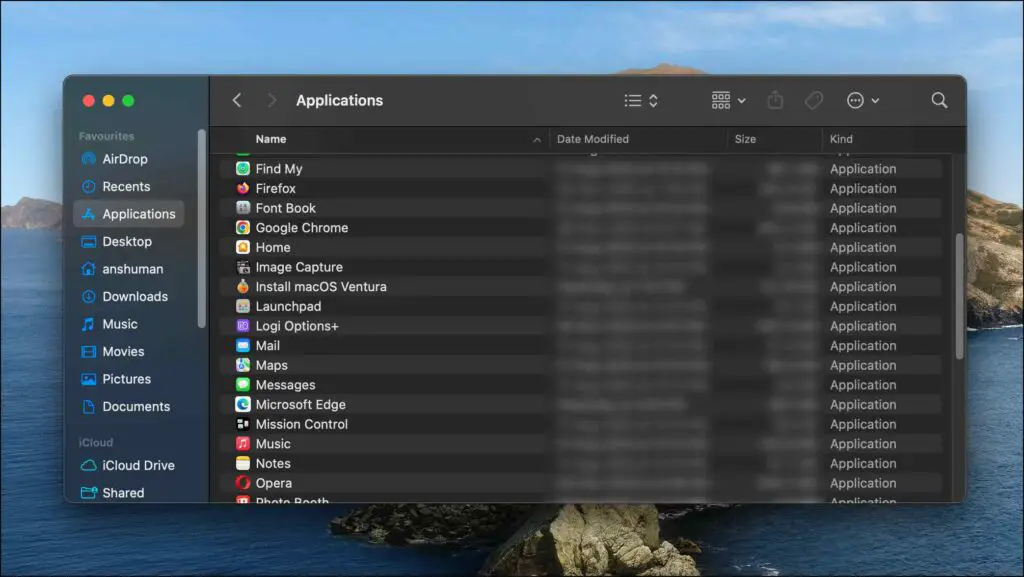
Note: Once the complete update file is downloaded, only then you will be able to find it in the Applications folder. It will appear as “Install macOS (Version name)” in Applications.
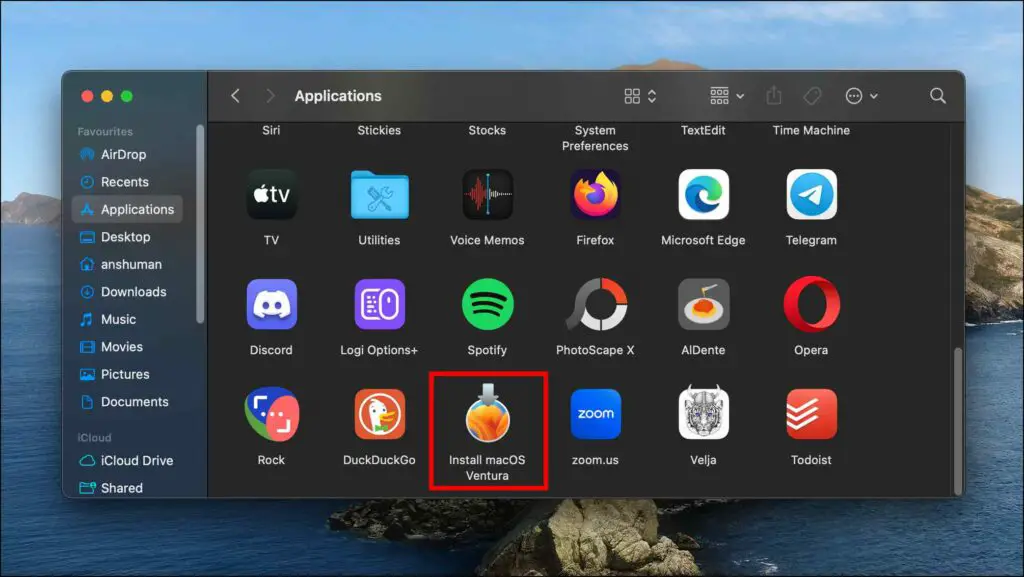
5. Right-click on the update file.
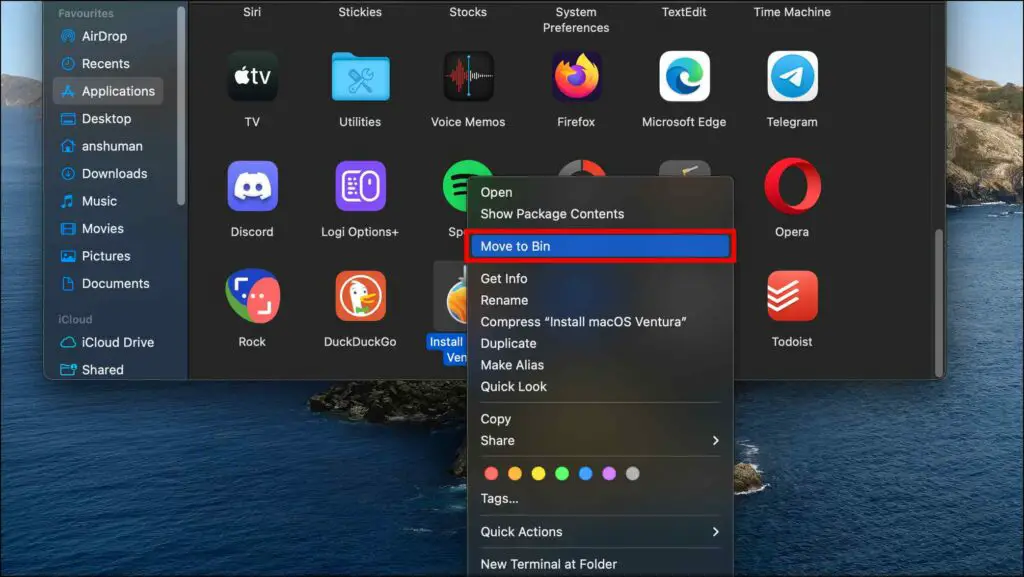
6. Now, choose the Move to Bin option. Doing so will move the entire macOS update file to the Bin.
7. Right-click on the Bin icon on the dock and select Empty Bin.
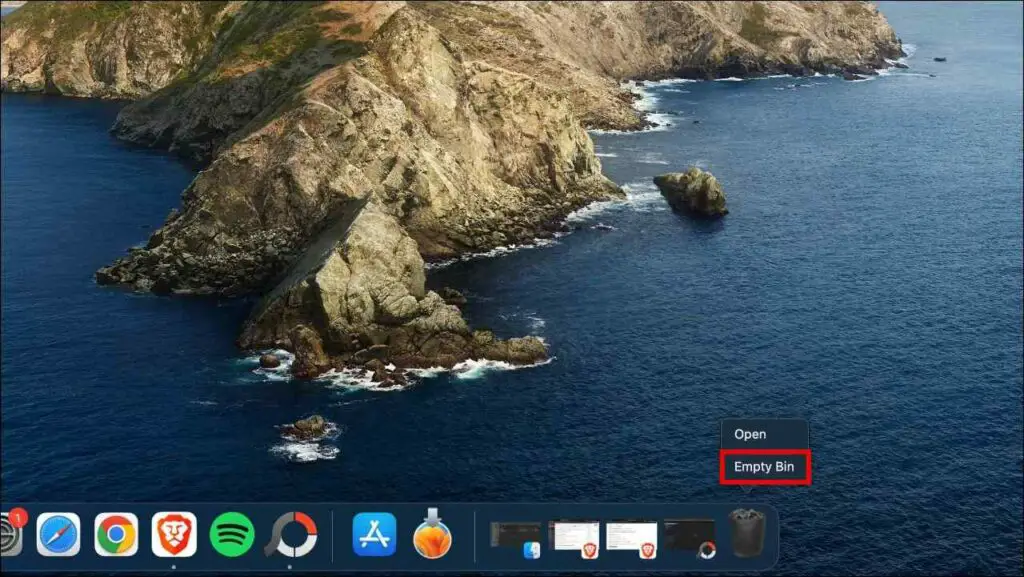
This will delete the entire file from your device freeing up the occupied storage space.
Delete a Downloaded Update on Mac Using Terminal
In case you are not able to find the update file within the Applications folder, you have the option to remove the update file using the command terminal. Here’s how it can be done:
1. Launch the Terminal app.
2. Type the following command in the Terminal for the respected update files.
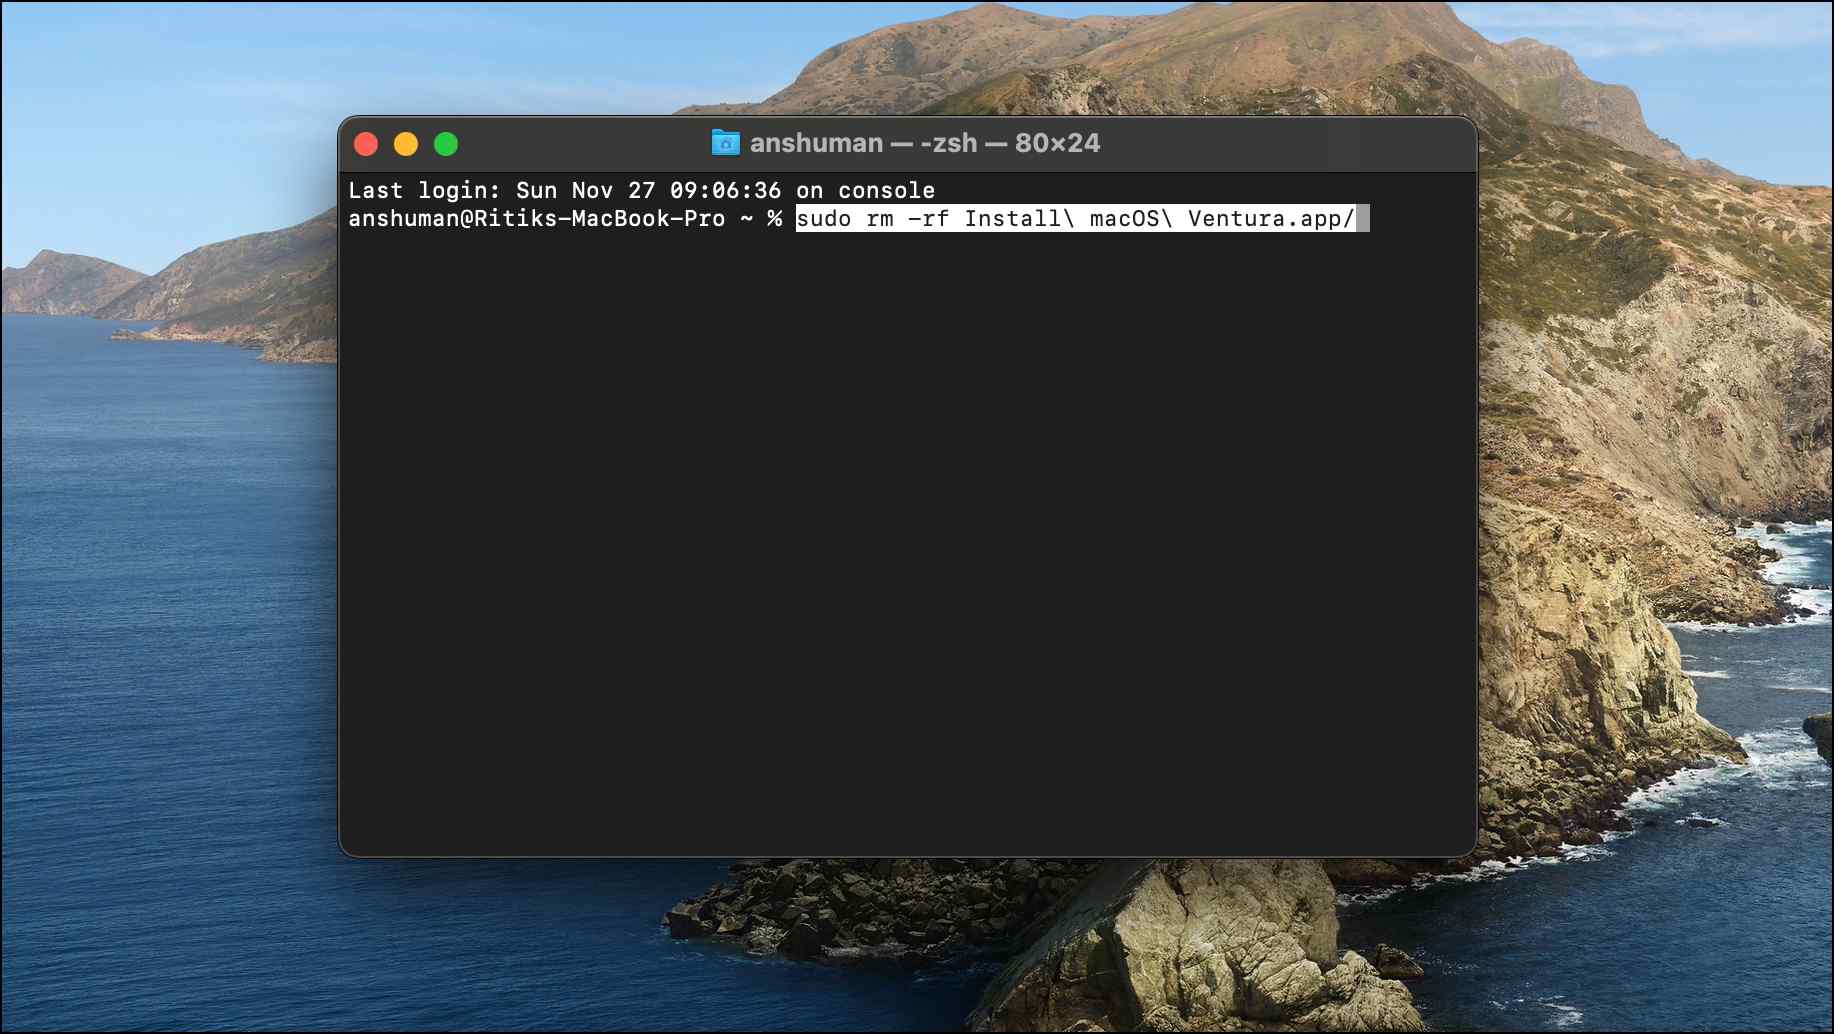
- Ventura Update File :
sudo rm -rf Install\ macOS\ Ventura.app/ - Monterey Update File :
sudo rm -rf Install\ macOS\ Monterey.app/ - Big Sur Update File :
sudo rm -rf Install\ macOS\ Big\ Sur.app/
Running the command in the Terminal should help clear the update files wherever they are located in your system.
Delete Update Using macOS Recovery System
If the above-mentioned methods are of no use and the update files keep piling up in your storage then the last resort is to use the macOS Recovery System to delete the macOS update files.
1. Restart your Mac, and press and hold Command + R until you see the Apple logo.
2. Once the Mac boots into Recovery, select the admin account and enter the password.
3. Now click on the Utility option located in the top status bar.
4. Select Terminal.
5. In the Terminal, type the command ‘csrutil disable‘ and press Return. Entering this command will give you unrestricted access to all files on your Mac.
6. Now Restart your Mac to enter normal mode.
7. Go to the Finder.

8. Click on the Go option located in the top status bar.
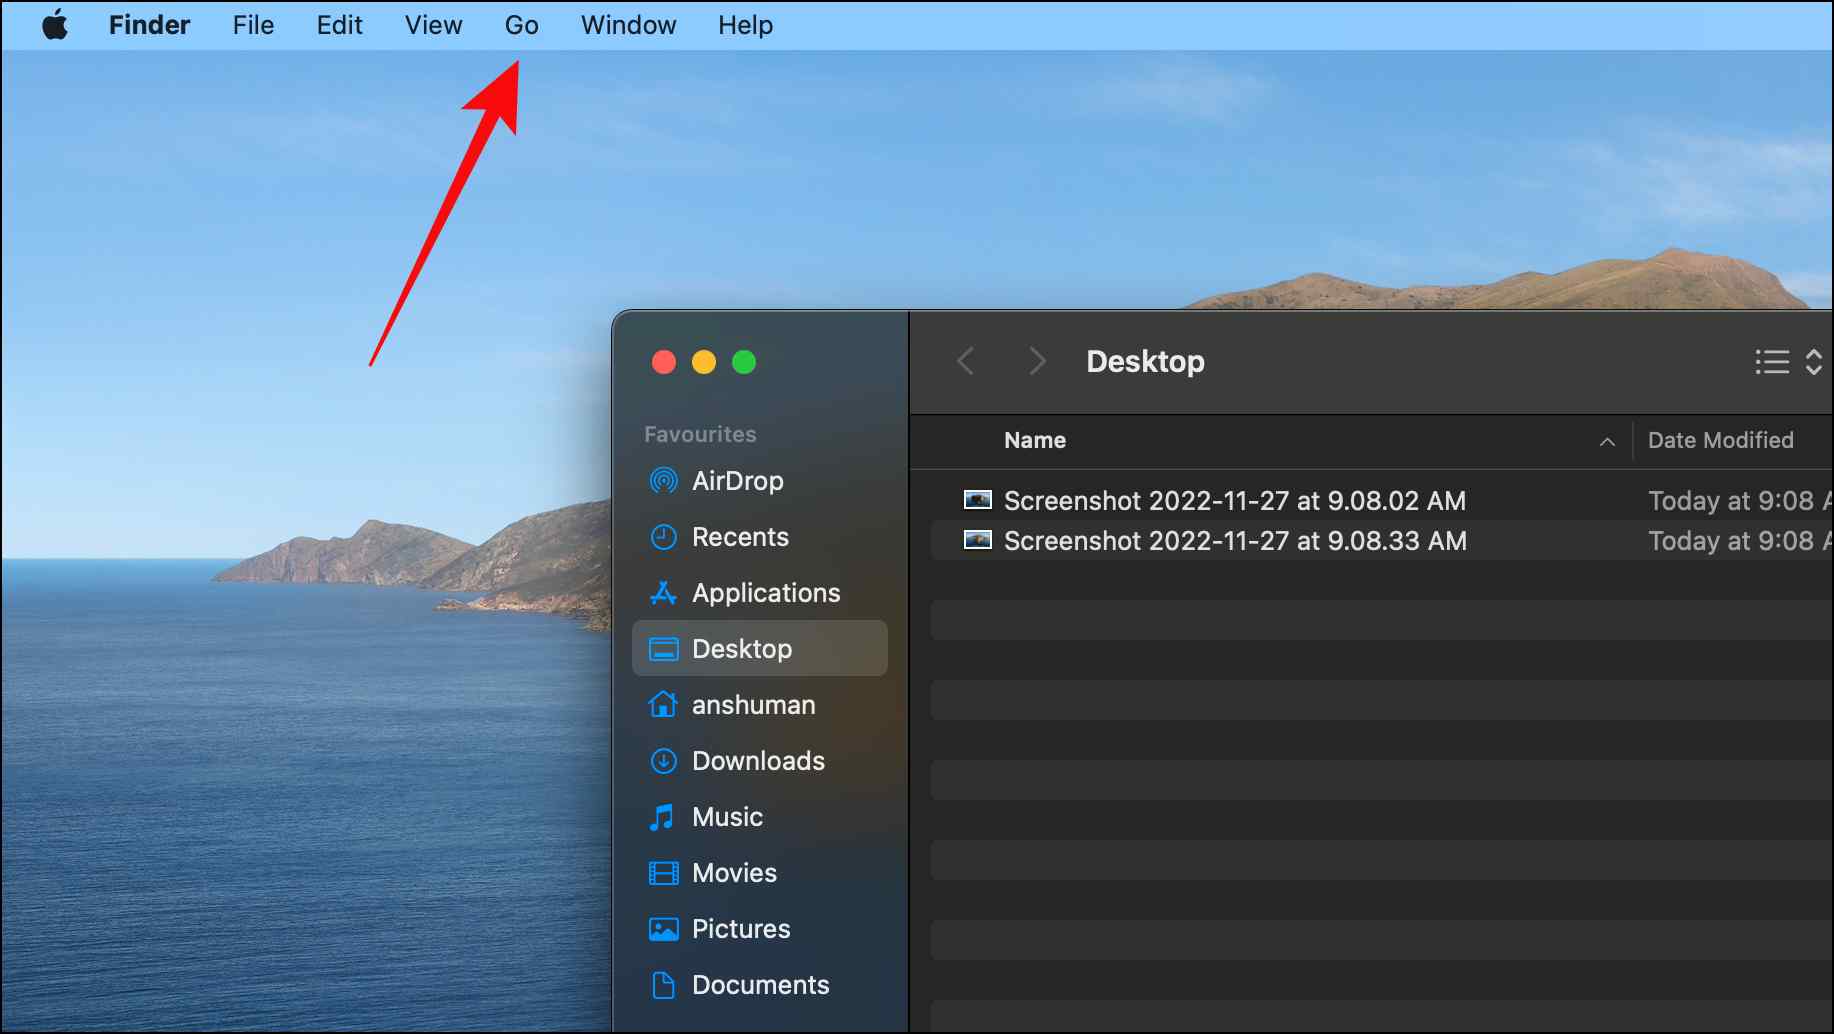
9. Select Go to folder… option.
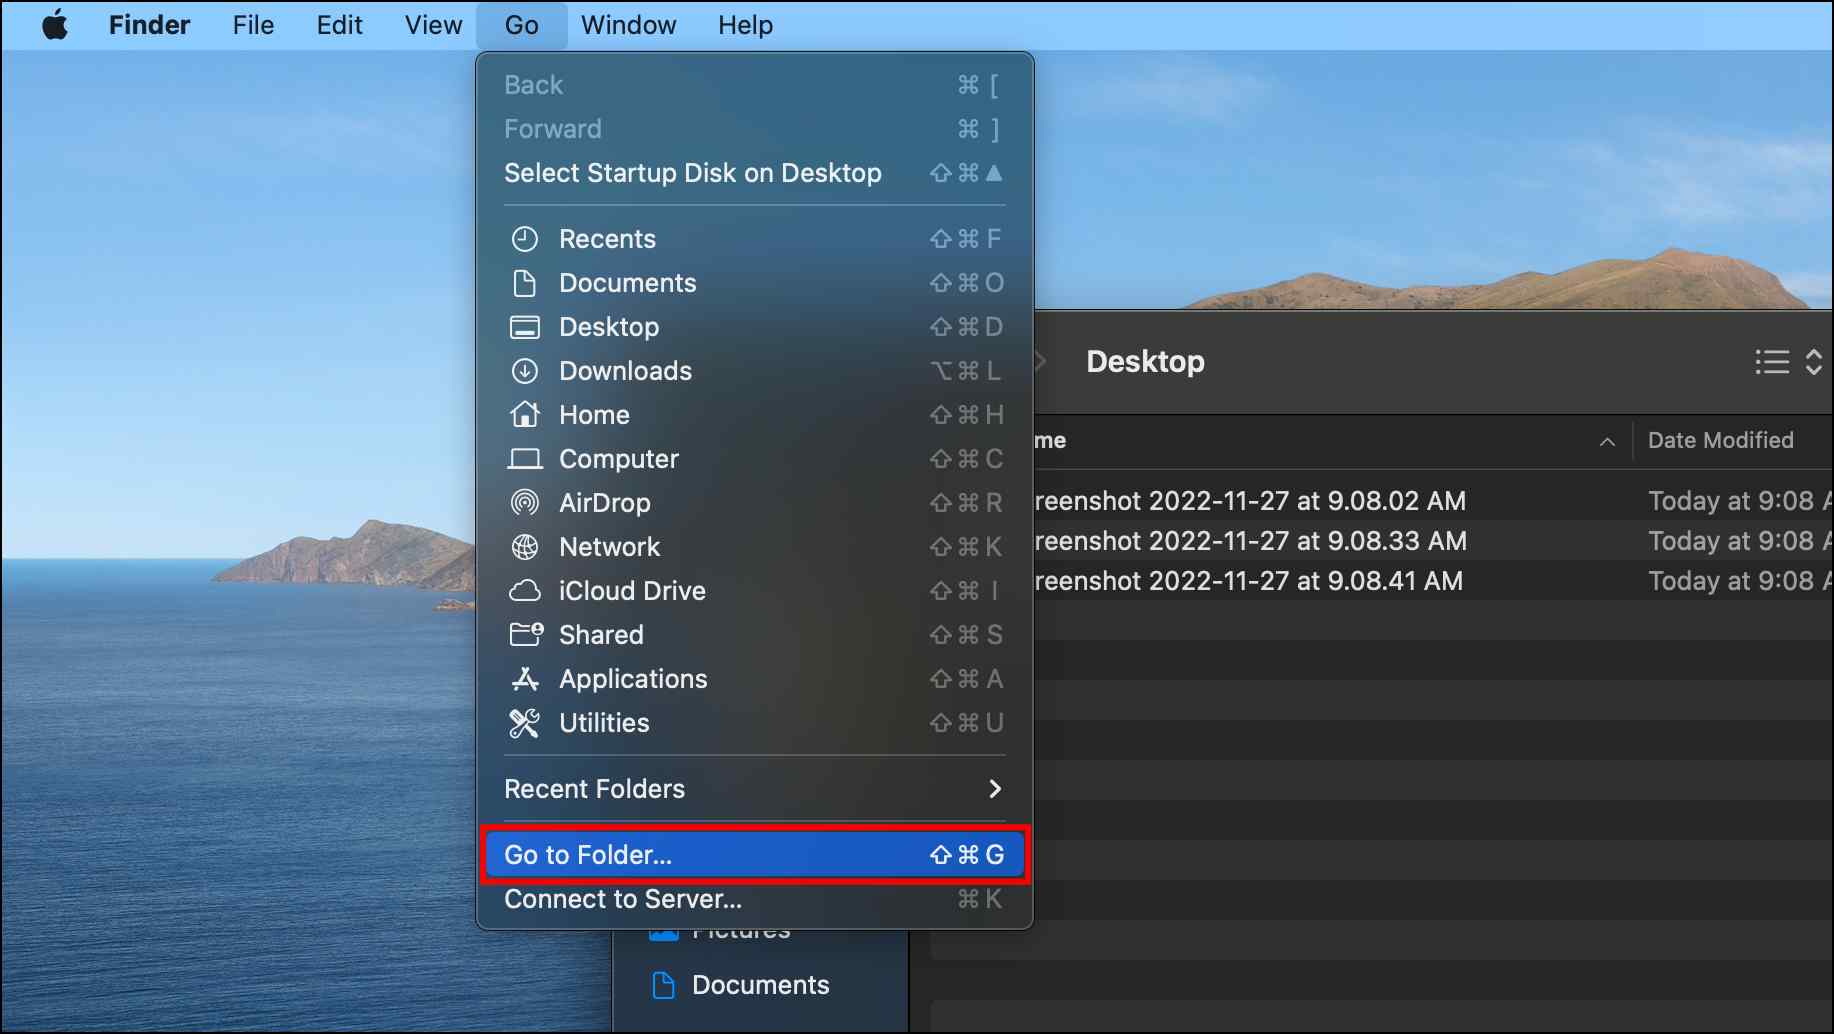
10. In the text field, type ‘/Library/Update‘ and to access the Update folder.
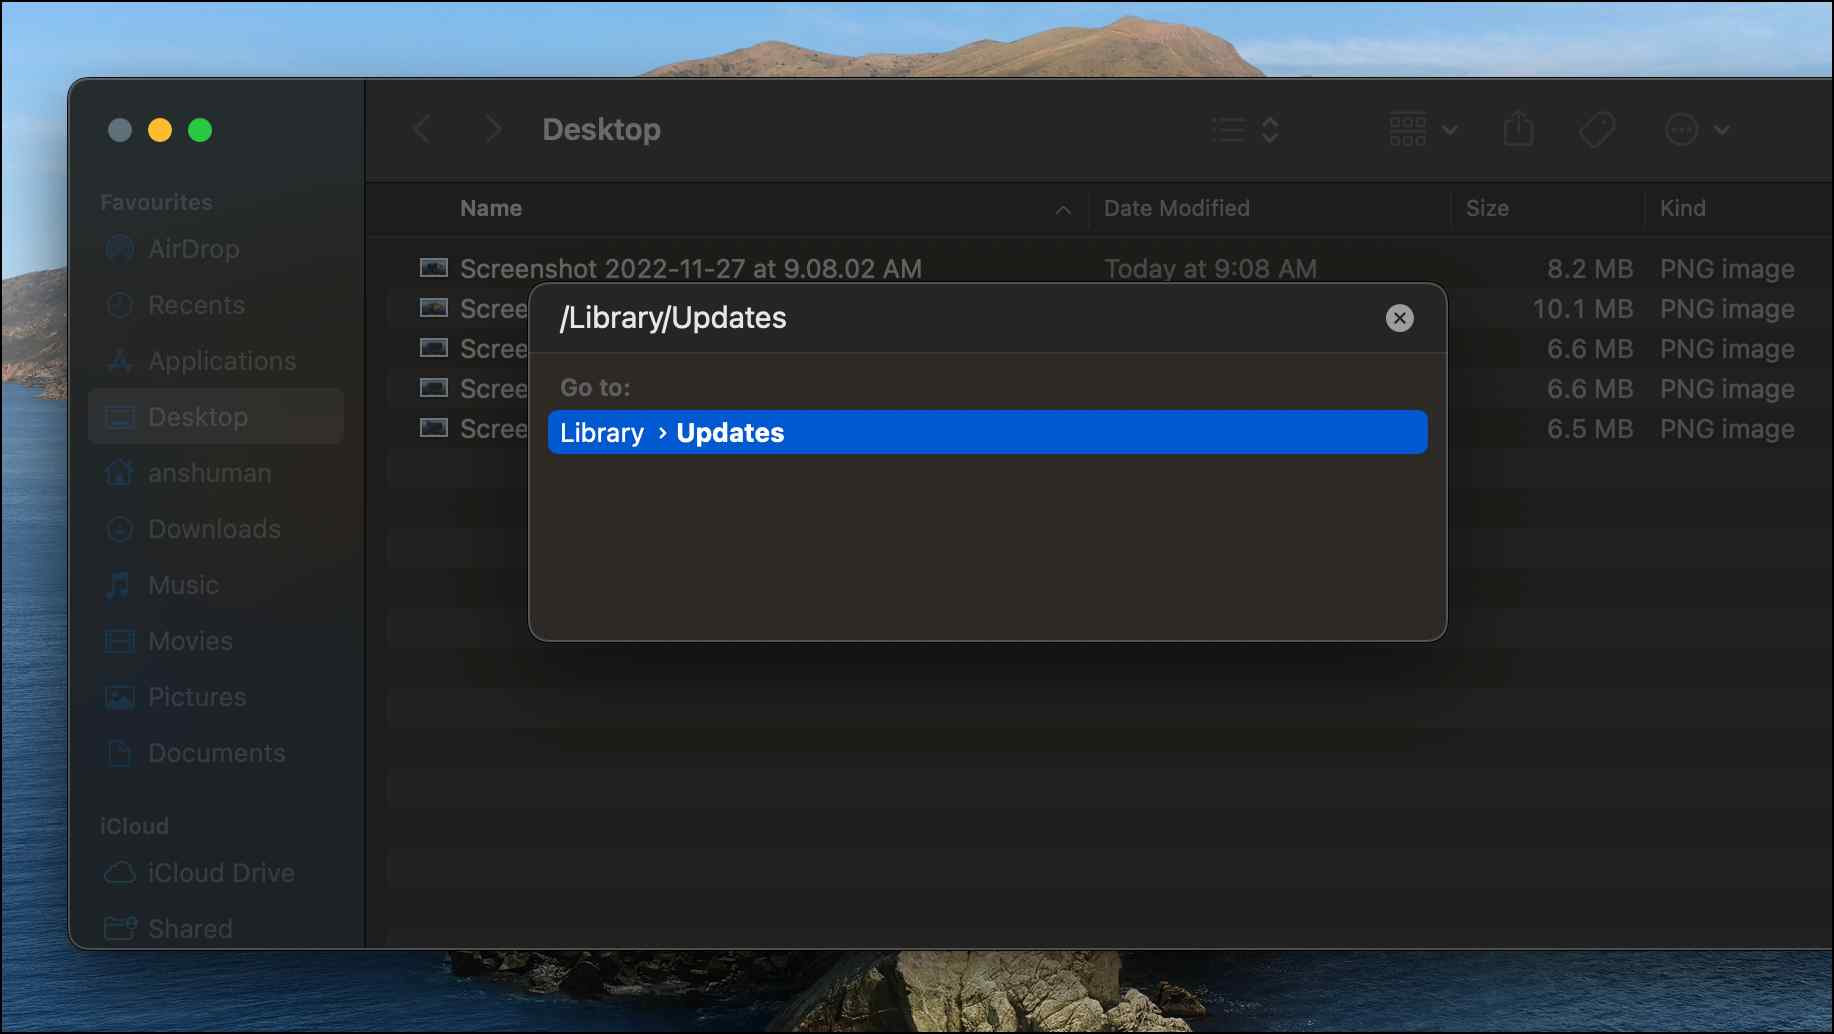
11. Select all the contents and right-click on them.
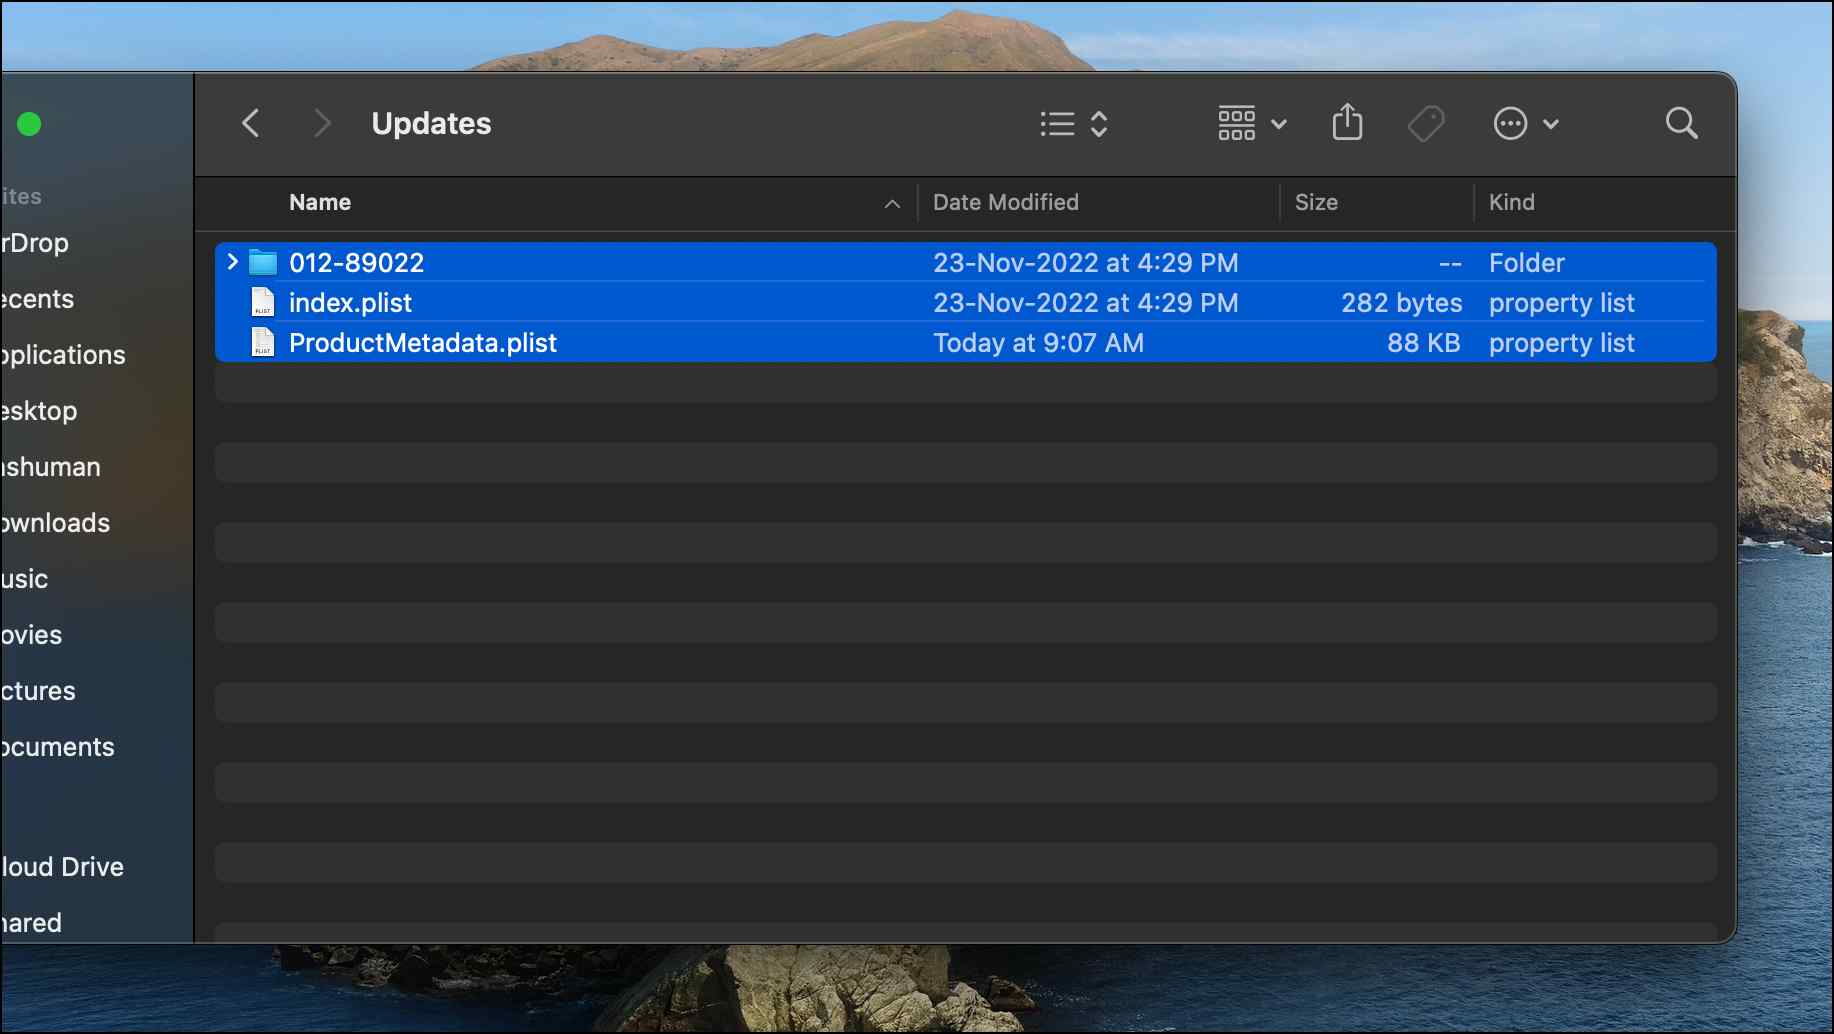
12. Choose Move to Bin.
13. Right-click on Bin and then select Empty Bin.

14. Now repeat steps 1 through 4.
15. In the Terminal, type the command ‘csrutil enable‘ to enable the protection again.
16. Restart your Mac and the macOS update files will be deleted.
Reasons to Not Install the Latest macOS Update
We all know that it is quite tempting to download the latest feature release of macOS to try out all the new stuff but there are some plausible reasons why you should hold off from downloading the latest version. Below we have discussed those reasons in brief. Take a look.
- Updates bring a bunch of new animations and changes that take up graphics and system resources and may slow down your device.
- Newer releases include system changes that require more CPU usage causing your device to run hotter.
- It may also cause your battery to drain faster, especially in older devices, and also increase charging times.
- Even if you choose not to update, automatic download of updates can take up precious storage space that can be utilized elsewhere.
- Latest macOS updates may include bugs that may break or result in certain apps and service crashes.
How to Disable Automatic Updates on Mac?
Before we proceed, macOS would not install updates without the user’s permission but it may download those updates by default. Still, it may take up unnecessary space in your Mac or might result in you accidentally installing those updates so it is better to turn them off. Here is how you can do so.
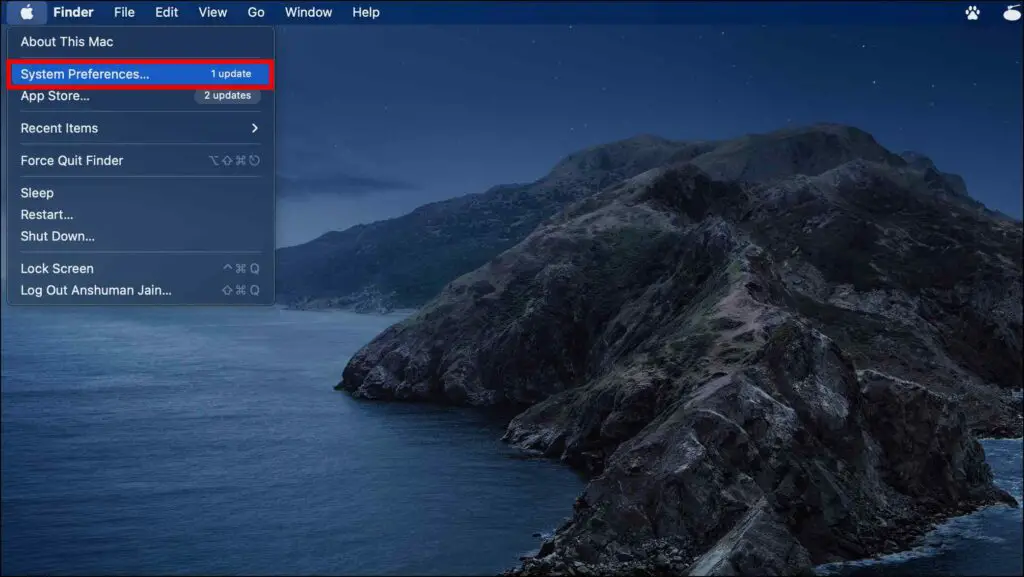
1. Click on the Apple logo in the top left corner.

2. Go to System preferences…
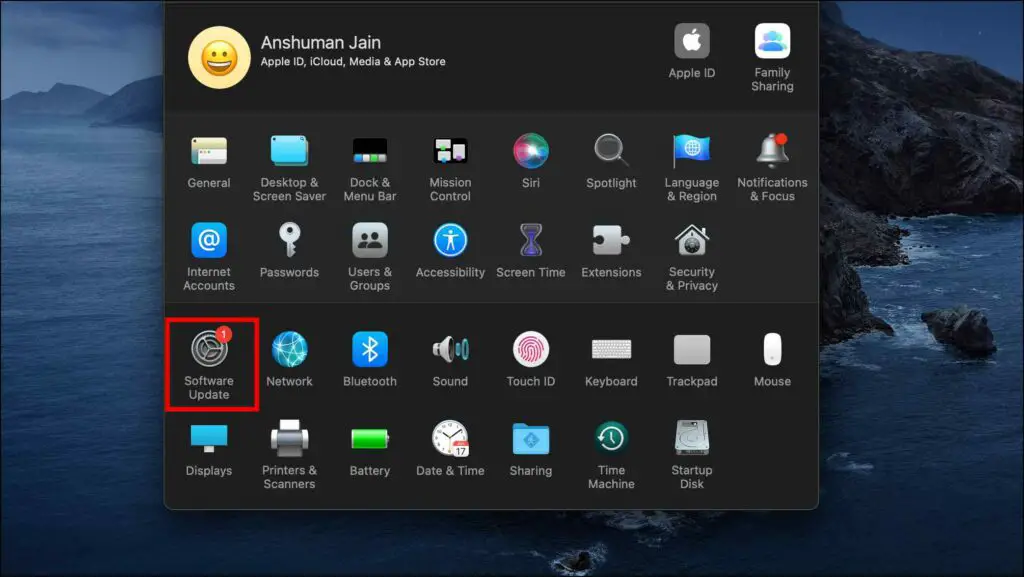
3. Under System Preferences, select Software Update.
4. Untick the box next to Automatically keep my Mac up to date.
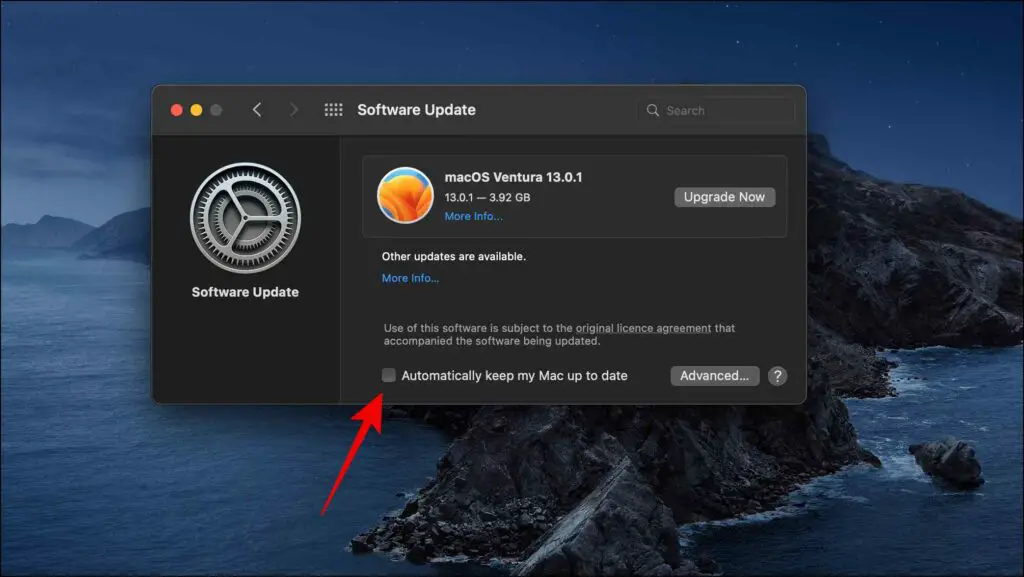
5. Now, click on Advanced…
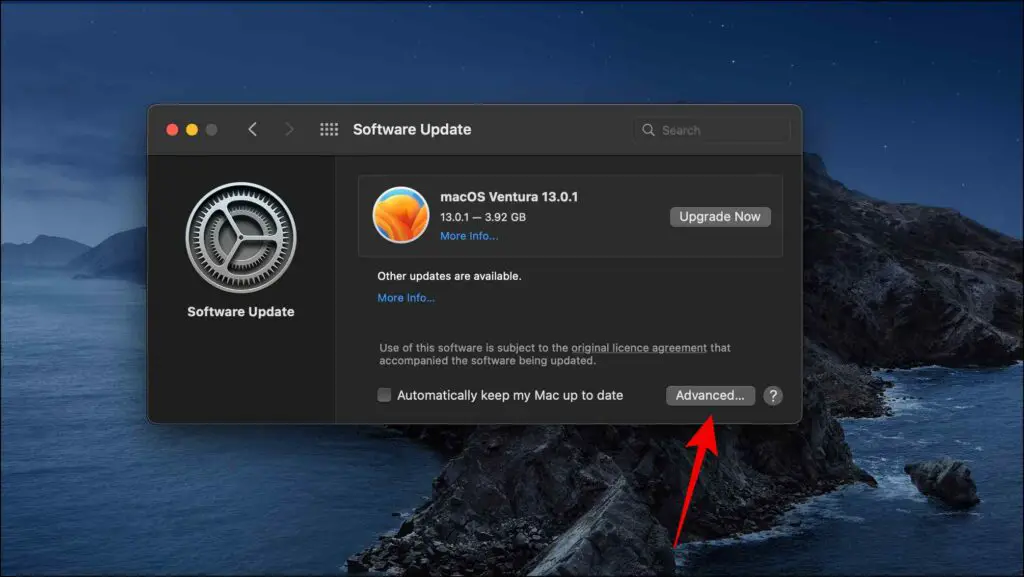
6. Untick all the options and click on OK.
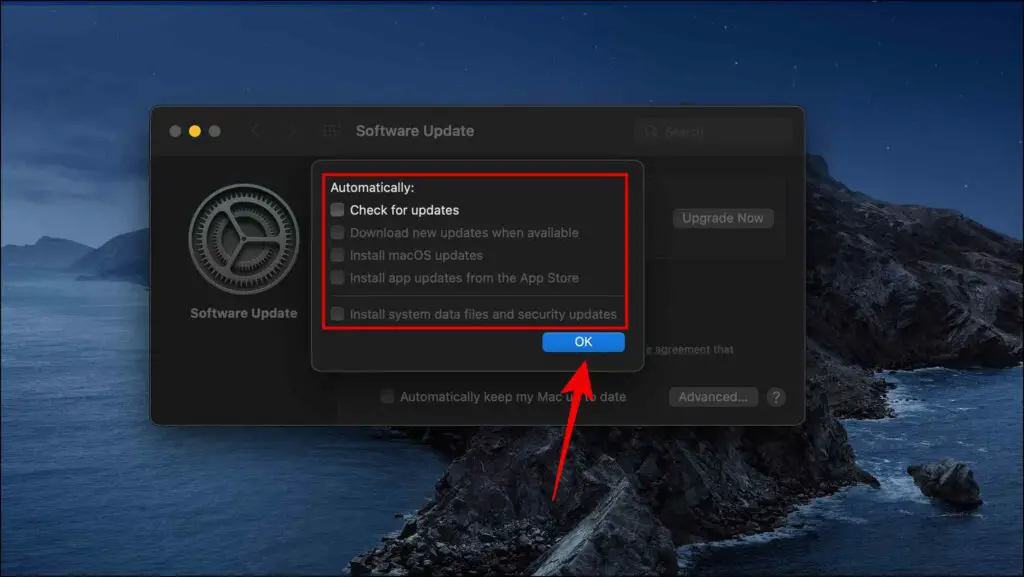
Alternatively, you can choose to keep the option Check for updates enabled.
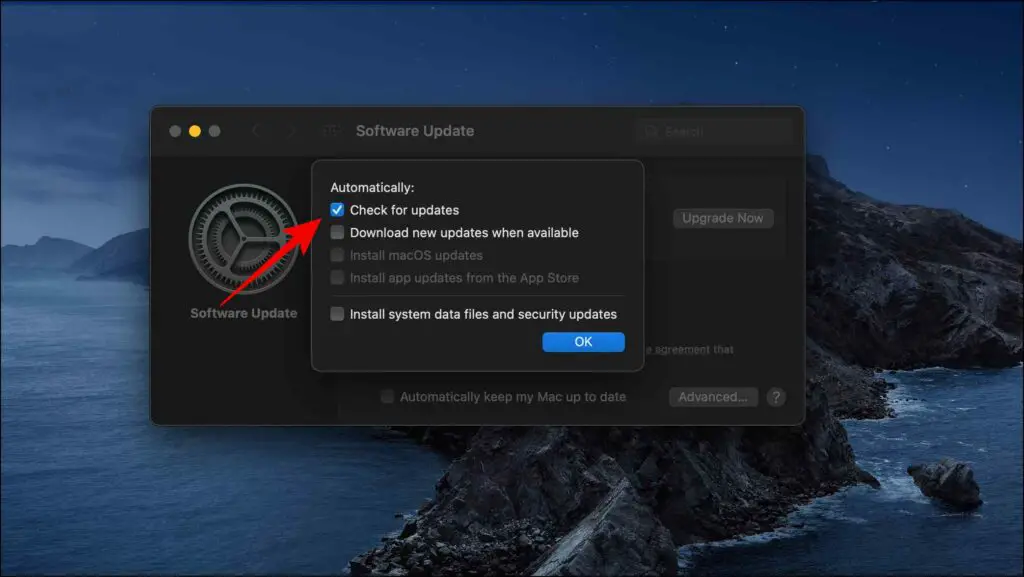
Now your Mac will not download updates automatically and you will have to visit Software Update settings to update your Mac.
Wrapping Up
We hope this guide was able to help you delete the updated files from your Mac and save some storage space. Do remember to always check out online articles and reviews of the new update before updating your device. Stay tuned on Gadgets To Use for more such articles. guides and How-Tos, and check the ones linked below.
You might be interested in:
You can also follow us for instant tech news at Google News or for tips and tricks, smartphones & gadgets reviews, join GadgetsToUse Telegram Group or for the latest review videos subscribe GadgetsToUse YouTube Channel.


